
| Workshop | Empennage | Wings | Fuselage | Contact |
My RV-10 Build Log |
 |
Construction started: October 8, 2009 Time invested thus far: 842 person-hours Time invested by me: 731 hours Rivet counter: 14,122 Parts counter: 2,412 |
When the wings are complete, I'll have to take a break because I can't yet afford the fuselage kit. Help! Any amount helps. |
Since the last update, I have completed the hinge drilling for the right wingtip; both lengths of hinge are match-drilled and deburred and set aside for now. This clears me to cut the 0.5" flange (containing the inboard hinge holes) off the wingtip. But as this is a long, messy process, I elected to not do it yet and instead work more on the lighting recess. I had managed to mess up one of my lens cuts on the stock plastic, so I ordered replacement lenses from Cee Bailey's Aircraft Plastics which were much nicer. The quality of the plastic is better and they're pre-cut to the correct shape (the right one didn't need any trimming at all; we'll see how the left one fares). I'd recommend asking Van's to not include the lens part on their wing kit order and just order Bailey's; it's worth it in my opinion. Screwing up the stock plastic trimming is easy; ask me how I know. Oh, but don't ask Bailey's to draw anything on your box... even though they called me to ask whether I wanted a 1950's robot or a futuristic robot on the box, they didn't actually draw anything. Boo!
Anyway, once I had the right-side lens finalized, I match-drilled it into the top and bottom surface of the wing tip for the attachment screws. While I was doing nutplate hole patterns, I figured I might as well do them all. So I finished the lighting recess facet cutouts and added all seven of the nutplate hole patterns for attaching the aluminum base plates:
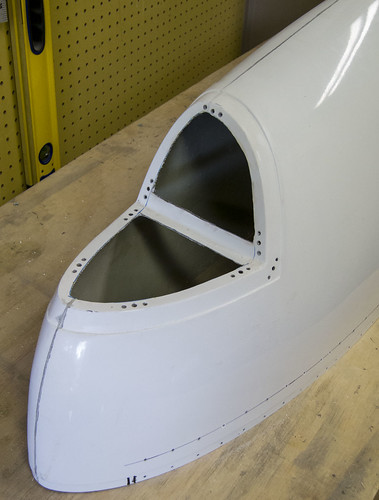
The AeroLEDs Pulsar NS90 LED navigation/strobe lights that I got for these lighting recesses require a chassis ground, so I decided that I'd run some grounding straps between the nutplates that attach the plates and (eventually) the hinge. That'll connect the metal of the base plates into the aircraft chassis and provide a good return for any accessories mounted there. Here's a photo of the nutplates installed around the lighting recess and the two grounding straps to connect everything to chassis ground:
Once the plates are screwed into place, there should be good electrical contact between everything and I won't have to worry about it.
8 Jul 2014
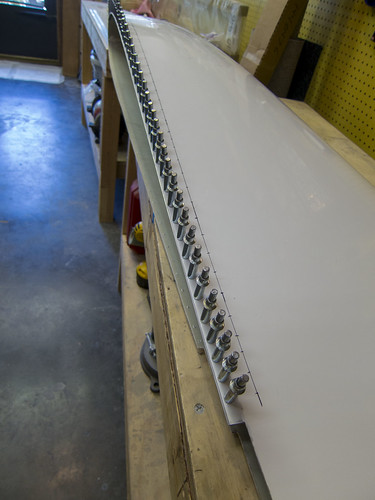
I've done a fair amount of work on the right wingtip over the last week. After my last post, I realized that I really wanted to use the MS20257-P4 hinges on my wingtips rather than the MS20257-P3 hinges that I cut and drilled previously. The reason for this is that the P4 hinges are slightly wider and will put the hinge eyelets fully inside the wingtip. This way, if there's any gap between the wingtip and wing skin, you'll just see the hinge flange beneath (which can be painted) rather than the eyelets. I think it'll be a cleaner install this way, and since I hadn't riveted anything yet, I went ahead and fabricated replacement hinges. Here's a picture of the new hinge about to be match-drilled to the hole pattern in the wing skin:
You can see how the hinge flange sticks out past the end of the wing skin by 1/8" now, whereas before it was flush with the skin.
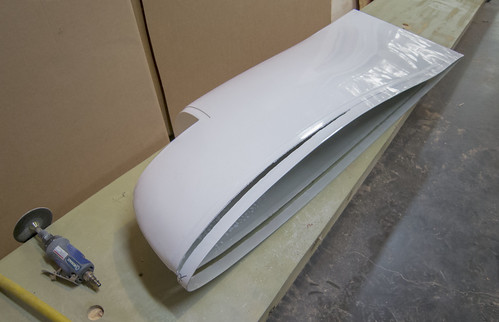
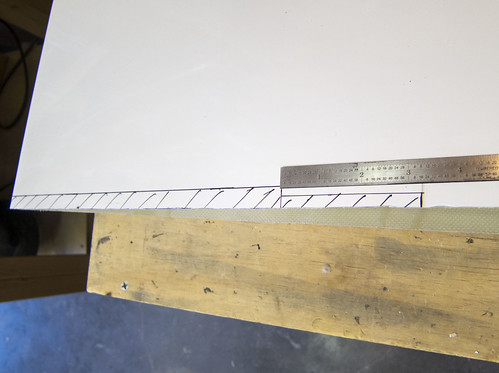
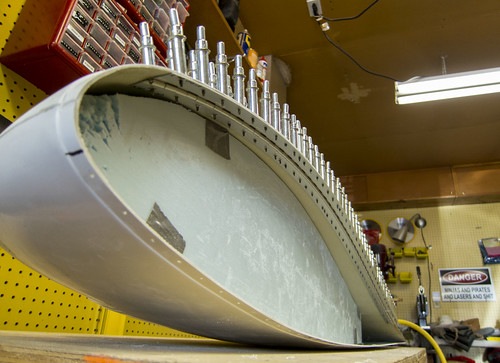
Next, I started trimming the wingtip itself. The tip shipped with a 1.5" flange which had to be cut down to 0.5". I used a die grinder to make the cut. Here's a picture from three quarters of the way through the process:
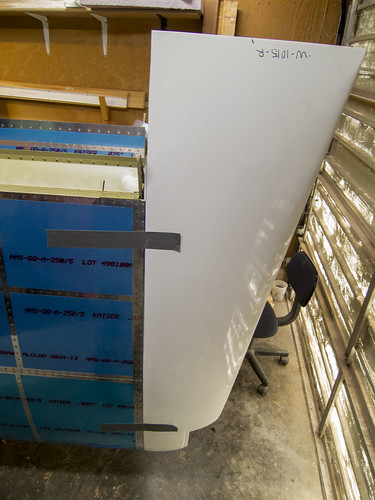
Once the flange was trimmed down, the wingtip still won't fit on the wing because the aft end runs into the aileron and aileron bearing hanger. I removed the aileron from the wing, but the bearing hangar rivets are still in the way, so I went ahead and made the final cuts to the wingtip's inboard edges.
As you can see here, the wingtip inboard edge gets cut an additional 1/2" in from the aft edges of the skin to the trailing edge, except for the first 3.25" on the bottom side, which only gets cut in 1/4". I made these cuts with a dremel. Once they were done, I could install the wingtip temporarily onto the wing without any major difficulty.
I ran into a few small obstructions where my 0.5" flange on the wingtip had to be shaved down a bit with a file because the outboard wing rib stuck out slightly here and there. After a few test-fits, I was able to tape down the wing and do the match-drilling of the wing skin's hole pattern into the fiberglass tip flange, clecoing as I went. Here's the result:
If you look closely in that picture, you can see that my 1/2" flanges extend slightly aft of the skins, despite the front of the wingtip being pressed firmly against the front wing skin. I trimmed that excess with a dremel shortly after this photo was taken.
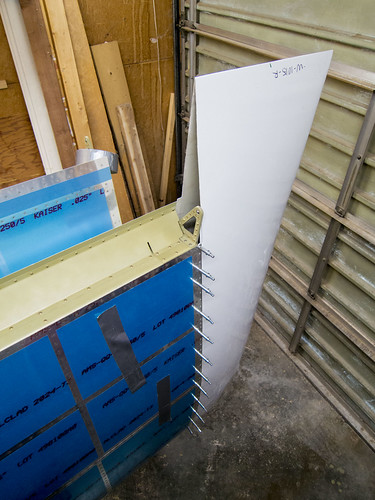
Now that the correct hole pattern is on both the wing-half of the hinges as well as the flange of the wingtip fiberglass, it was time to remove the wingtip and attach the flange to it (temporarily). This required putting the hinge pin back into the hinge, and I didn't want to cut the pin to length yet, so it sticks way out aft of the wingtip. Here's a photo of the full top hinge clecoed to the inside of the wingtip:
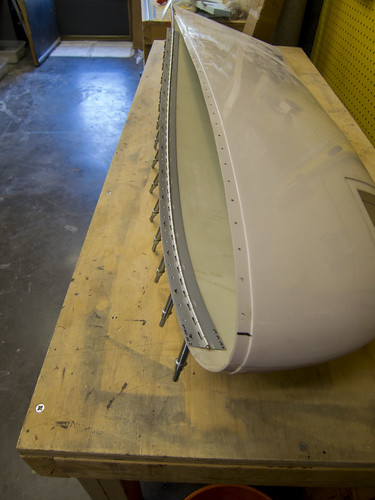
From here, I flipped the wingtip over and marked out the hole locations desired for the other half of the hinge on the outer surface of the wingtip. I also added clecos to every hole to ensure that the holes would be true. The new hole line is 1" outboard of the existing holes (which will put the holes roughly in the center of the outboard hinge halves if you're using the -P4 hinges).
From this point, it was an easy task to drill through the fiberglass and outboard hinge half at each marked location, filling the holes with clecos as I went.
With all the holes drilled, I removed the hinge from the wingtip, deburred the outboard half, removed the pin, and stored the hinge halves and pin for now. I have to repeat this process for the bottom hinge, then it'll be time to cut off the flange. But that'll come later.
In the meantime, my NAV/POS wingtip lights showed up from Van's today! In the special notes section of the order form, I asked them to draw a robot on the box and the box showed up with this on the bottom:
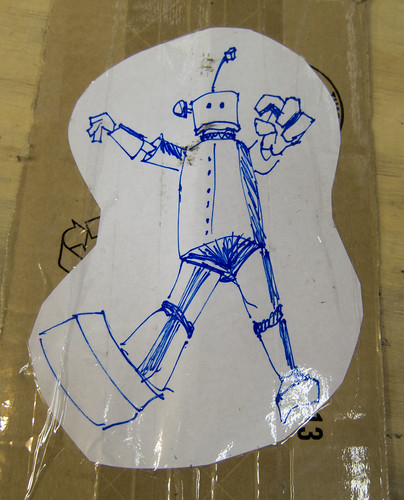
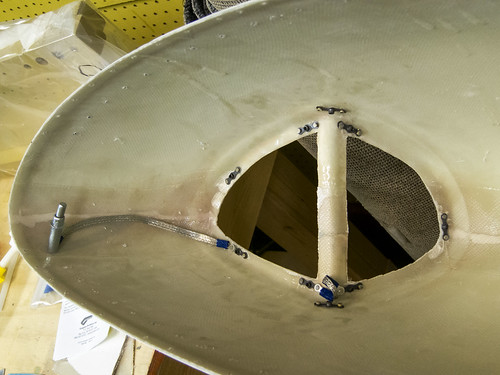
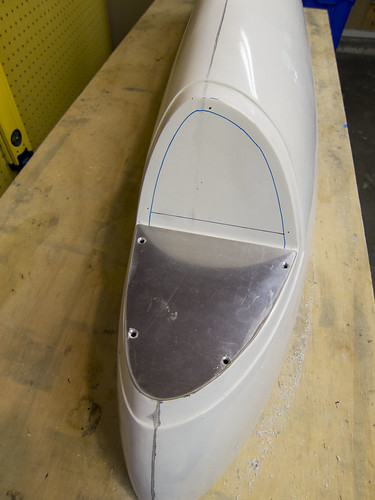
Nice work, Van's! Anyway, I was inspired to get some work done on the NAV/POS area. I knew I wanted to mount some reflective metal plates to both faces of the lighting recess, so I cut a couple pieces of 0.040" aluminum sheet to fit the odd shapes. Then I used a dremel to cut out all but a 0.5" flange of the outboard-facing facet.

As you can see, I put holes for four #6 nutplates around the edge to hold the metal plate to the wingtip. Lastly, I match-drilled the #21 holes for the screws through to the metal plate:
Now I can attach the lighting fixture to the metal plate without having to work inside the fiberglass wingtip. However, I'm going to wait on the final positioning of the light fixture until I know exactly where the plastic lens will be. So that's next.
Archives of Previous Updates
June, 2014 - Wingtip work begins! Work on left wing continues.April and May, 2014 - No work on the RV-10. :-(
March, 2014 - Work on left wing continues.
February, 2014 - Work on both wings continues.
January, 2014 - Work on both wings continues.
December, 2013 - Work on both wings continues.
November, 2013 - Work on both wings continues.
October, 2013 - Left wing main body work continues.
September, 2013 - Left wing final assembly begins.
August, 2013 - Ailerons and Flaps complete.
July, 2013 - Fuel tanks complete. Main body work continues.
June, 2013 - Left fuel tank work continues.
May, 2013 - Work on both fuel tanks continues.
April, 2013 - Work on both fuel tanks continues.
March, 2013 - Fuel tank and aileron work continues.
February, 2013 - Fuel tank and aileron work continues.
January, 2013 - Right fuel tank work continues... slowly.
December, 2012 - Right fuel tank work continues... slowly.
November, 2012 - Right fuel tank work continues.
October, 2012 - Final assembly of right fuel tank begins.
September, 2012 - Left fuel tank ~completed.
August, 2012 - Right flap completed, attached to wing for storage.
July, 2012 - Work on right flap continues (out of the country half the month).
June, 2012 - Work on all aspects of the right wing continues.
May, 2012 - Wing Main Body work continues.
April, 2012 - Wing Main Body work continues.
March, 2012 - Fuel Tank work continues.
February, 2012 - Wing Main Body work continues (out of town for half the month).
January, 2012 - More Wing Main Body work, started on wing cart (out of town for awhile).
December, 2011 - Wing Main Body work continues (out of town for half the month).
November, 2011 - Wing Main Body work continues.
October, 2011 - Wing Main Body work continues.
September, 2011 - Fuel Tank and Wing Main Body work continues.
August, 2011 - Fuel Tank and Wing Main Body work continues.
July, 2011 - Fuel Tank work continues, Aileron Actuation work begins.
June, 2011 - Leading Edges ~complete, Fuel Tank work begins, Aileron work continues.
May, 2011 - Leading Edge work continues.
April, 2011 - No work on the RV-10.
March, 2011 - Leading Edge work continues.
February, 2011 - Leading Edge work continues, started Flaps.
January, 2011 - Main Spars ~complete, Leading Edge work continues.
December, 2010 - Aileron and Leading Edge work continues.
November, 2010 - Wing kit delivery, wing work begins (out of town most of the month).
October, 2010 - Empennage Fairing work continues (out of town most of the month).
September, 2010 - Empennage Fairing work continues, got my private pilot's license.
August, 2010 - Empennage Attach completed, Empennage Fairings begins.
July, 2010 - Tail Cone completed, Empennage Attach begins.
June, 2010 - Tail Cone gets primed and riveting begins.
May, 2010 - Tail Cone accessory work nearly complete.
April, 2010 - Tail Cone accessory work continues (out of the country most of the month).
March, 2010 - Tail Cone accessories begin to arrive (out of the country most of the month).
February, 2010 - Horizontal Stabilizer completed, started work on Tail Cone.
January, 2010 - Eleavators completed, Horizontal Stabilizer near completion.
December, 2009 - Elevators near completion (10 day vacation slows progress).
November, 2009 - Finished the VS and Rudder, started work on Elevators.
October, 2009 - Empennage kit delivery; started work on VS and rudder.
September, 2009 - Workshop preparation.