
| Workshop | Empennage | Wings | Fuselage | Contact |
| <-- September 2012 | November 2012 --> |
Chronological Updates, October, 2012
06 Oct 2012
This build log gets an RSS feed! There is now a link in the upper right of the main page linked to http://mouser.org/projects/rv-10/rss.xml. Clicking on it with a modern browser will allow you to subscribe to the updates posted here in the feed reader of your choice. If you don't have a reader, give Google Reader a whirl.
In other news, I've started prepping the right fuel tank skin for final assembly. It was left in a state of having been match-drilled but basically nothing else. I've now deburred all of the inside holes. Remaining tasks on that piece prior to beginning the sealant/riveting work on the right tank are:
14 Oct 2012
In the last week I've made good progress on the right fuel tank skin. All of the checklist items ennumerated in the previous post were taken care of. I didn't take a ton of pictures of this process since I covered all of that for the last wing, but here's a couple:
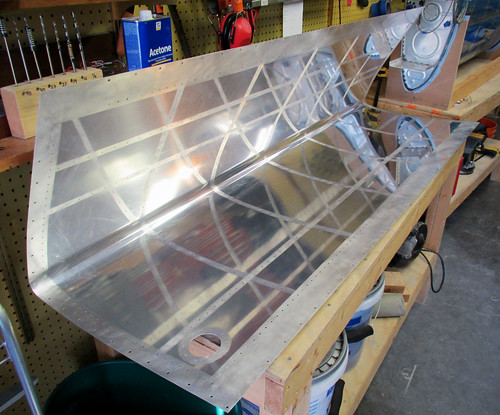
That's the inner faces of the skin showing scuffing complete (and deburring, though that makes no noticeable change) and all the schmutz cleaned off. Not visible is the blue vinyl on the other side of the skin, which has now been removed in stripes along the rivet lines. This means that the skin was ready for dimpling!
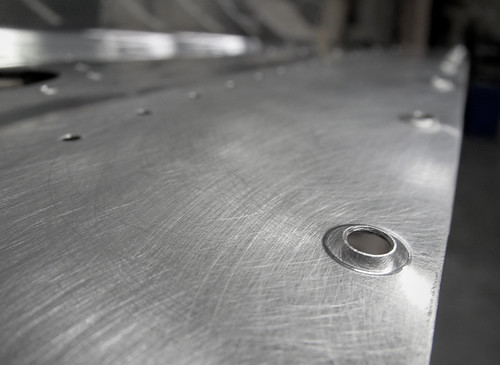
I had Jamie come over and we ripped through all the dimpling pretty quickly. Definitely have a friend come over and help with this, because it goes way faster. And definitely don't forget to do one of the lines of #8 dimples while the friend is there somehow, and be forced to do that line solo later. Ask me how I know. Anyway, they're all done now:
I didn't have time tonight to do any actual sealant and riveting work, but I did go ahead and mask off the three parts that get riveted to the inside of the top tank skin:
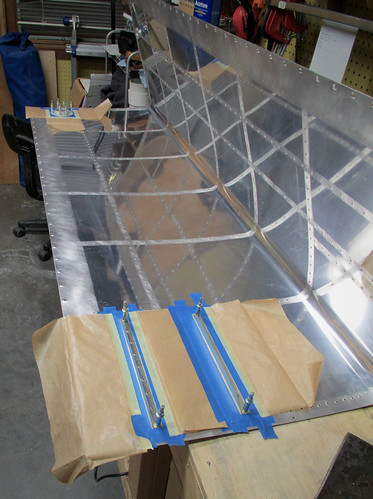
Those three parts should use up one 10g dose of sealant nicely, with a bit left over to attach a few of the small bits that get attached to the end ribs. But that's for the next post, whenever I get around to it.
21 Oct 2012
I'm making steady progress on getting stuff riveted to the right fuel tank skin. The only trouble is that said progress is quite slow. The fuel cap flange and vent clip are done, as are 10 of the 14 stiffeners and all of the tooling hole fillers in the inboard and outboard ribs.

I should be able to get the last four stiffeners done in a single 10g batch of sealant. After that, it'll be another 10g batch to get all of the various bits and pieces squeezed onto the inboard aft rib, apply the drain fitting, and put the forward inboard rib in place. All of those parts can be squeezed. Those two sealant iterations should be done sometime this week.
Fun fact: the first rivet on the fifth stiffener I installed was the 10,000th rivet in the airplane!
24 Oct 2012
I've now finished all of the bits that I can back-rivet onto the skin, specifically the fuel cap flange, vent clip, and the 14 skin stiffeners. I also went ahead and did the "squeezer pass" which encompassed the drain fitting, the forward inboard rib, and a bunch of the goodies that get riveted to the aft inboard rib. Here's a picture showing the drain fitting and the inboard rib in place:
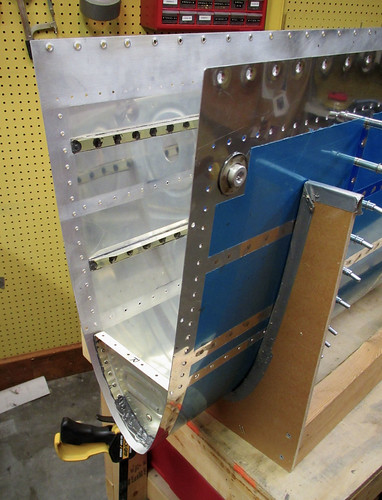
Ten grams of sealant wasn't quite enough to do all of the fillet and rivet head coverup work on all those parts, largely due to the large amount of sealant required to do the forward fillet on the rib since the rib has bend holes there that have to be covered. I'll have to come back over these parts with some excess sealant at some later date. No problem. I did get one bad rivet on the forward inboard rib which will need to be drilled and replaced, so I guess it's good I didn't cover the back in sealant yet...
The next riveting tasks are the five interior ribs, all of which I'll need help completing.
This build log gets an RSS feed! There is now a link in the upper right of the main page linked to http://mouser.org/projects/rv-10/rss.xml. Clicking on it with a modern browser will allow you to subscribe to the updates posted here in the feed reader of your choice. If you don't have a reader, give Google Reader a whirl.
In other news, I've started prepping the right fuel tank skin for final assembly. It was left in a state of having been match-drilled but basically nothing else. I've now deburred all of the inside holes. Remaining tasks on that piece prior to beginning the sealant/riveting work on the right tank are:
- Remove vinyl from rivet lines on outer faces
- Debur outer holes
- Scuff contact areas on inner faces
- Clean inner faces
- Dimple all holes
14 Oct 2012
In the last week I've made good progress on the right fuel tank skin. All of the checklist items ennumerated in the previous post were taken care of. I didn't take a ton of pictures of this process since I covered all of that for the last wing, but here's a couple:
That's the inner faces of the skin showing scuffing complete (and deburring, though that makes no noticeable change) and all the schmutz cleaned off. Not visible is the blue vinyl on the other side of the skin, which has now been removed in stripes along the rivet lines. This means that the skin was ready for dimpling!
I had Jamie come over and we ripped through all the dimpling pretty quickly. Definitely have a friend come over and help with this, because it goes way faster. And definitely don't forget to do one of the lines of #8 dimples while the friend is there somehow, and be forced to do that line solo later. Ask me how I know. Anyway, they're all done now:
I didn't have time tonight to do any actual sealant and riveting work, but I did go ahead and mask off the three parts that get riveted to the inside of the top tank skin:
Those three parts should use up one 10g dose of sealant nicely, with a bit left over to attach a few of the small bits that get attached to the end ribs. But that's for the next post, whenever I get around to it.
21 Oct 2012
I'm making steady progress on getting stuff riveted to the right fuel tank skin. The only trouble is that said progress is quite slow. The fuel cap flange and vent clip are done, as are 10 of the 14 stiffeners and all of the tooling hole fillers in the inboard and outboard ribs.
I should be able to get the last four stiffeners done in a single 10g batch of sealant. After that, it'll be another 10g batch to get all of the various bits and pieces squeezed onto the inboard aft rib, apply the drain fitting, and put the forward inboard rib in place. All of those parts can be squeezed. Those two sealant iterations should be done sometime this week.
Fun fact: the first rivet on the fifth stiffener I installed was the 10,000th rivet in the airplane!
24 Oct 2012
I've now finished all of the bits that I can back-rivet onto the skin, specifically the fuel cap flange, vent clip, and the 14 skin stiffeners. I also went ahead and did the "squeezer pass" which encompassed the drain fitting, the forward inboard rib, and a bunch of the goodies that get riveted to the aft inboard rib. Here's a picture showing the drain fitting and the inboard rib in place:
Ten grams of sealant wasn't quite enough to do all of the fillet and rivet head coverup work on all those parts, largely due to the large amount of sealant required to do the forward fillet on the rib since the rib has bend holes there that have to be covered. I'll have to come back over these parts with some excess sealant at some later date. No problem. I did get one bad rivet on the forward inboard rib which will need to be drilled and replaced, so I guess it's good I didn't cover the back in sealant yet...
The next riveting tasks are the five interior ribs, all of which I'll need help completing.
| <-- September 2012 | November 2012 --> |