
| Workshop | Empennage | Wings | Fuselage | Contact |
| <-- May 2012 | July 2012 --> |
Chronological Updates, June, 2012
15 Jun 2012
The Ides of June are upon us, and the right wing top skin is done!
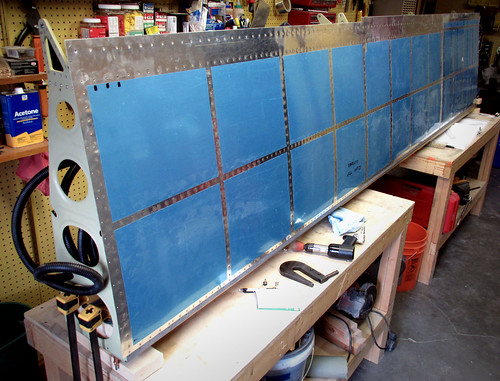
(sort of.) There's still 4 rivets that need to be done, which were deemed bad upon initial installation and have since been drilled out. As long as I don't accidentally install the bottom skins before fixing those 4 rivets, I am free to continue on with other tasks. The first of which is pulling the 3/4" black plastic conduit through the ribs:
This turns out to be a really slow and effort-intensive process. I got about 1/3 of the way through the wing and had to stop for awhile. I'll get back to that. Instead, I finished off the gap fairings and gap fairing stiffener:
Most of these rivets could be squeezed, except for the flush-head ones at the inboard end which were too long for my squeezer to handle, and one near the aileron/flap interface where the hinge hangers got in the way of using the squeezer.
The next steps are to finish the conduit and start on the bottom skins!
16 Jun 2012
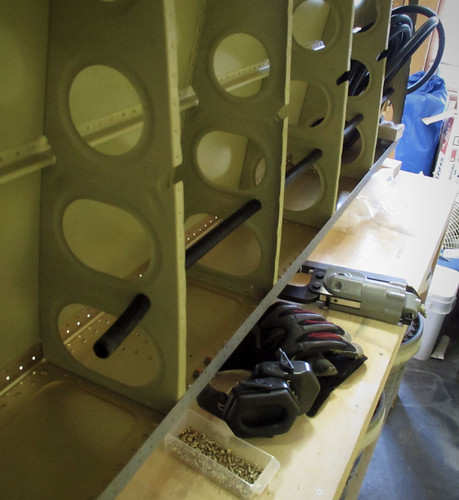
Finished the conduit in the right wing. Holy crap that was a pain.

Definitely start running conduit from the outboard end, getting conduit through the holes in the inboard wing walk ribs that are close to each other is a real pain. I was glad I only had to move a couple feet of conduit through there instead of all 15' of it. I left a couple feet of conduit sticking out each end so that I could tend the ends later. Before I put the bottom skin on I'll probably go through and put a dab of RTV on each rib/conduit junction to prevent vibration from slowly cutting through the conduit.
The right leading edge landing light assembly wasn't complete, so I spent a bit of time this evening getting it caught up with the left side. The plexiglass lens is now cut to size and all of the metal bits are in place, though the edges of the plexi will eventually need to be trimmed up so there are no nicks or sharp corners.
I went ahead and installed the light bracket as well, if for no other reason than it is a convenient place to store the bracket.
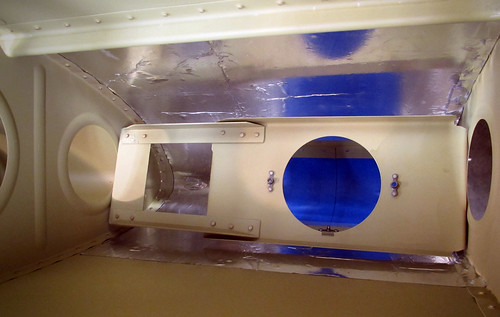
This puts the right leading edge at the point of being ready for final assembly onto the wing.
17 Jun 2012
Today was a big day for the RV-10, as it was the first day of actual final assembly of the right wing. The first thing I started with was construction of the wing cradle, which I would need once the leading edge as attached to the main wing body. I had cut the lumber back in January but hadn't gotten around to actually assembling it until today. First up were the three vertical frames:
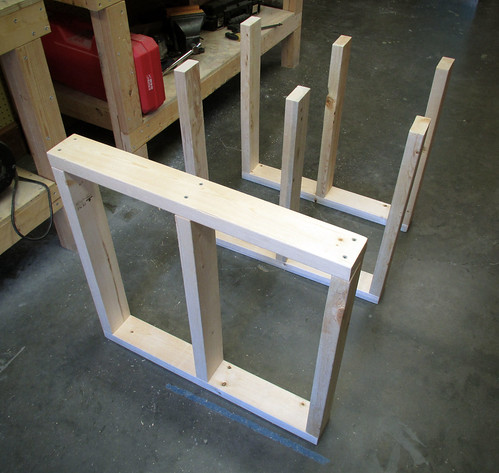
From there, I attached the long 2x6 boards and all of the rest of the little pieces. The last things to go on were the casters and the carpet. Here's a shot of the inboard end of the cradle fully assembled:
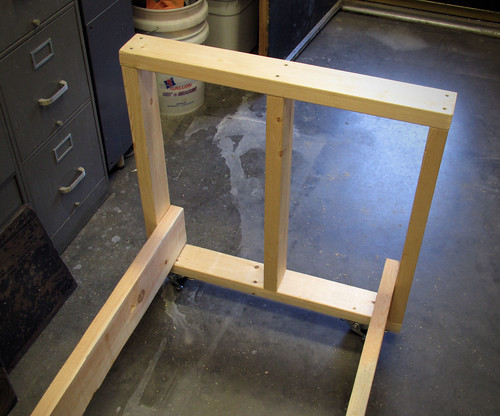
Not much to look at, but it's done. Here's a shot of the outboard end without the carpet so you can see where all the pieces go:

And finally, the outboard end with the carpet stapled on:
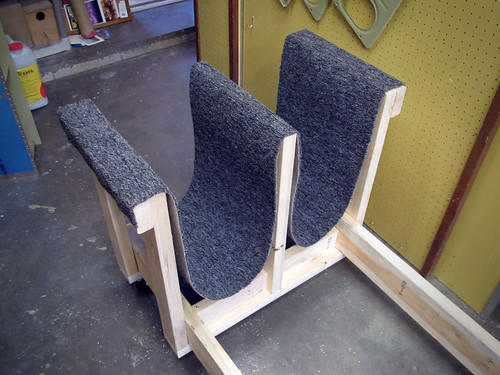
A few notes regarding the carpet: if you use my dimensions for the lumber, then the strip of carpet should be 16" x 8'. Find and mark the middle of the carpet, then staple it across the middle bar of the cradle. Next, take the ends of the carpet and staple them along the bottom edge of the outer-most face of the cradle. Put lots of staples across the tops of the side bars to keep the carpet held in place well and you're all set. These dimensions and attachment locations will keep the wing away from the wood and reasonably level. I tested mine by standing with one foot in each of the two carpet cradles. I weigh about 200 pounds (92kg) and the cradle had no problems with that at all. Cradle complete!
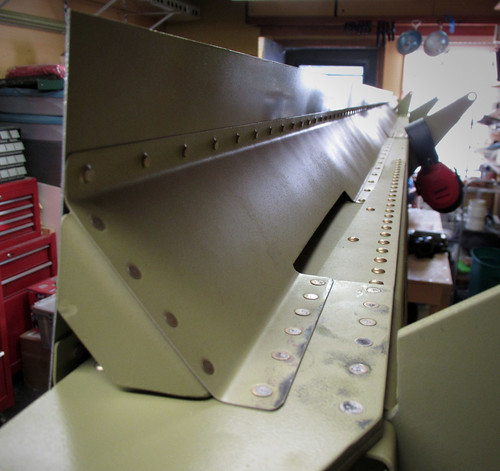
I put the cradle aside and brought the right wing body back out into the shop. I clamped it down to one of my 5' tables so that the outboard end stuck out into free space. With a helper sitting in a low chair, I got the leading edge lined up with the main spar and cleco'd into place.

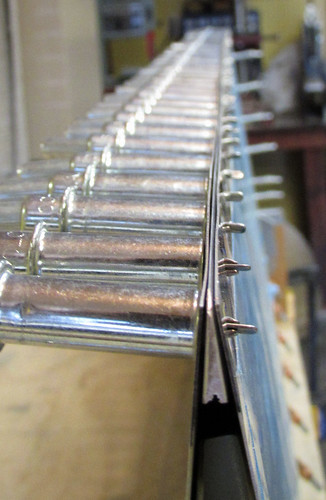
There's about 200 rivets holding the leading edge onto the main spar, and they went pretty quickly. A bunch of the rib rivets are blind rivets, and the entire bottom edge can be squeezed. Jeremy helped me bang out the rest of them in short order. The joint in the top skin between the main body and the leading edge is amazingly flush:

With that done, I moved the wing into the cradle which supported the wing beautifully.
I went ahead and cleco'd the bottom J stiffeners and skins in place because the wing makes a great place to store them until it is time to finish up the bottom skins.
Exactly as planned, I was able to roll the cradle and wing out my shop door and into the garage without much trouble (the important part being that it isn't too wide for my narrow door). And now the shop is clear for whatever the next task is going to be. Options include
22 Jun 2012
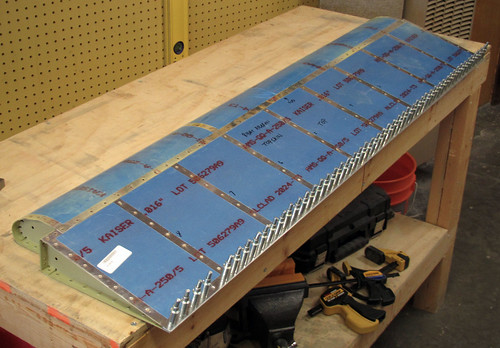
Had the day off so I worked on the right aileron. I started by riveting the top skin on, which is reasonably straightforward solo.
Getting the bottom skin on is a bit more challenging, since you must reach down inbetween the two skins to buck the rivets. However, somewhere along that line of rivets I did pass the 9,000th rivet in the plane! Here's a picture of my gloved hand holding the bucking bar in place with just a couple fingers:
I found it was actually pretty easy like this. Use a small tungsten bucking bar and just lay it down on the spar web, then hold it up against the rivets with your fingers. No chance for damage of the top skin and the rivet shop heads come out looking pretty good.
Next up was to cleco in the end ribs and the trailing edge extrusion, then rivet the ribs to the spar (just 4 rivets total). Here's the result:
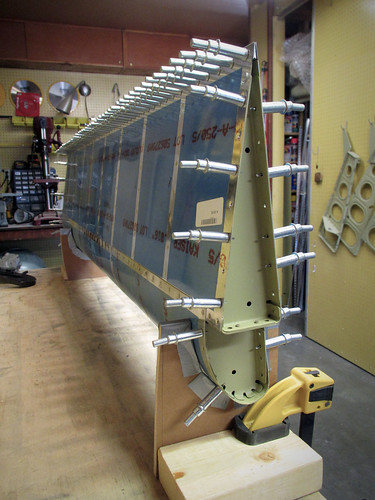
I was happy to see that my trailing edge was very straight.
Once all of the main rib rivets are done, the only pieces left are the trailing edge and the hinge bits. Here's the almost-complete aileron awaiting the trailing edge sealant:
And here it is under a big stack of books after I had applied sealant:
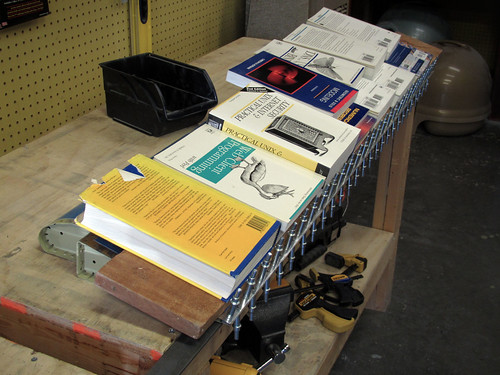
I mixed 20g of sealant with 2g of accelerant for this and that was probably twice as much as I need, so I recommend using a 10/1 mix if you're making ProSeal out of the can. I'm going to let this sit for a few days, then pull the clecos (and soak them in MEK for a couple days) and get to back-riveting the double-flush trailing edge rivets.
23 Jun 2012
While waiting for the aileron trailing edge sealant to cure, I got a head start on the right flap assembly by riveting together all of the nose ribs.
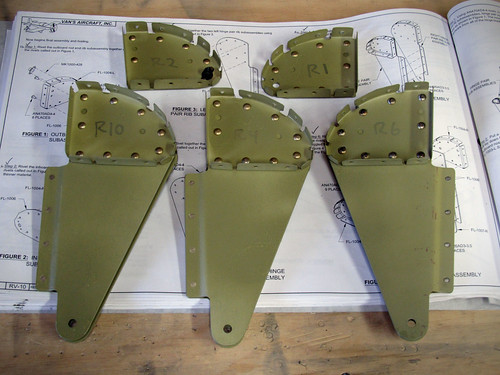
All but the center hinge hanger can be squeezed. The center one is too thick for my squeezer to get any leverage on it. I ended up putting the double-flush rivet flange in a vice and then solo riveting the AN470 rivets with gun and bucking bar. No problems.
26 Jun 2012
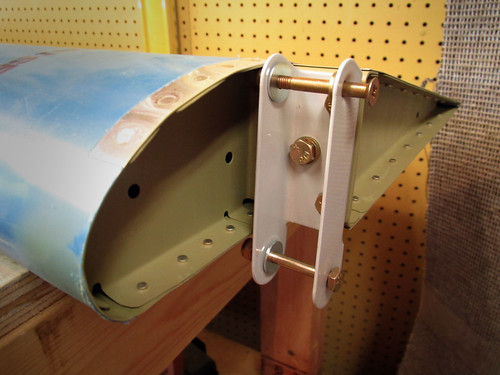
After a couple days of the right aileron trailing edge sealing, I took the clecos out and back-riveted the trailing edge double-flush rivets. It turns out that 2 days of curing wasn't quite enough for the ProSeal; it separated in one little place. So next time, 3 days. The rivets looked great, so I moved on to the hinge hardware. Here is a picture of the inboard hinge weldment, which has the pivot pin at the bottom and the actuation attachment pin at the top.
And here is the outboard hinge weldment. Somewhere on this assembly I need to work in a bonding strap to connect to the main wing body. I'll worry more about this later.

I haven't cut the aluminum spacer yet, so I technically don't have all of the pieces for the aileron done yet, but it's pretty close. I went ahead and put the aileron in place on the wing body to see how it fit and to have a place to store it. Here's the full-down position:
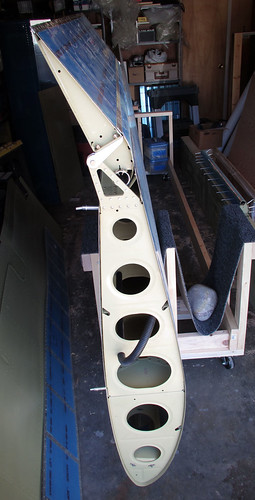
And here's the full-up position:

With the aileron off the workbench for awhile, I'll move on to the right flap.
The Ides of June are upon us, and the right wing top skin is done!
(sort of.) There's still 4 rivets that need to be done, which were deemed bad upon initial installation and have since been drilled out. As long as I don't accidentally install the bottom skins before fixing those 4 rivets, I am free to continue on with other tasks. The first of which is pulling the 3/4" black plastic conduit through the ribs:
This turns out to be a really slow and effort-intensive process. I got about 1/3 of the way through the wing and had to stop for awhile. I'll get back to that. Instead, I finished off the gap fairings and gap fairing stiffener:
Most of these rivets could be squeezed, except for the flush-head ones at the inboard end which were too long for my squeezer to handle, and one near the aileron/flap interface where the hinge hangers got in the way of using the squeezer.
The next steps are to finish the conduit and start on the bottom skins!
16 Jun 2012
Finished the conduit in the right wing. Holy crap that was a pain.
Definitely start running conduit from the outboard end, getting conduit through the holes in the inboard wing walk ribs that are close to each other is a real pain. I was glad I only had to move a couple feet of conduit through there instead of all 15' of it. I left a couple feet of conduit sticking out each end so that I could tend the ends later. Before I put the bottom skin on I'll probably go through and put a dab of RTV on each rib/conduit junction to prevent vibration from slowly cutting through the conduit.
The right leading edge landing light assembly wasn't complete, so I spent a bit of time this evening getting it caught up with the left side. The plexiglass lens is now cut to size and all of the metal bits are in place, though the edges of the plexi will eventually need to be trimmed up so there are no nicks or sharp corners.
I went ahead and installed the light bracket as well, if for no other reason than it is a convenient place to store the bracket.
This puts the right leading edge at the point of being ready for final assembly onto the wing.
17 Jun 2012
Today was a big day for the RV-10, as it was the first day of actual final assembly of the right wing. The first thing I started with was construction of the wing cradle, which I would need once the leading edge as attached to the main wing body. I had cut the lumber back in January but hadn't gotten around to actually assembling it until today. First up were the three vertical frames:
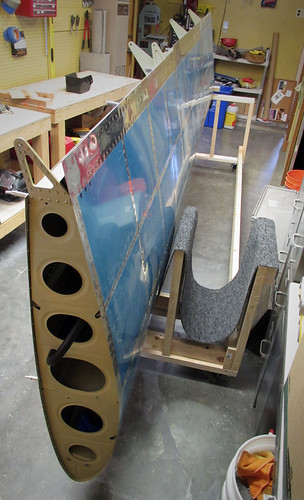
From there, I attached the long 2x6 boards and all of the rest of the little pieces. The last things to go on were the casters and the carpet. Here's a shot of the inboard end of the cradle fully assembled:
Not much to look at, but it's done. Here's a shot of the outboard end without the carpet so you can see where all the pieces go:
And finally, the outboard end with the carpet stapled on:
A few notes regarding the carpet: if you use my dimensions for the lumber, then the strip of carpet should be 16" x 8'. Find and mark the middle of the carpet, then staple it across the middle bar of the cradle. Next, take the ends of the carpet and staple them along the bottom edge of the outer-most face of the cradle. Put lots of staples across the tops of the side bars to keep the carpet held in place well and you're all set. These dimensions and attachment locations will keep the wing away from the wood and reasonably level. I tested mine by standing with one foot in each of the two carpet cradles. I weigh about 200 pounds (92kg) and the cradle had no problems with that at all. Cradle complete!
I put the cradle aside and brought the right wing body back out into the shop. I clamped it down to one of my 5' tables so that the outboard end stuck out into free space. With a helper sitting in a low chair, I got the leading edge lined up with the main spar and cleco'd into place.
There's about 200 rivets holding the leading edge onto the main spar, and they went pretty quickly. A bunch of the rib rivets are blind rivets, and the entire bottom edge can be squeezed. Jeremy helped me bang out the rest of them in short order. The joint in the top skin between the main body and the leading edge is amazingly flush:
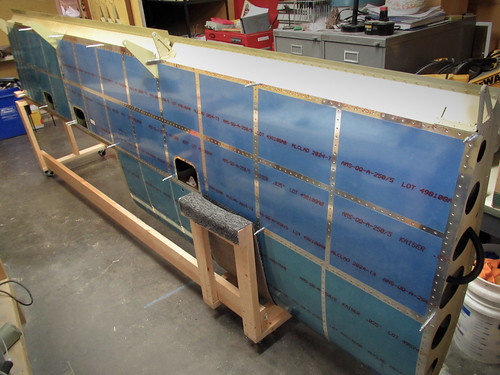
With that done, I moved the wing into the cradle which supported the wing beautifully.
I went ahead and cleco'd the bottom J stiffeners and skins in place because the wing makes a great place to store them until it is time to finish up the bottom skins.
Exactly as planned, I was able to roll the cradle and wing out my shop door and into the garage without much trouble (the important part being that it isn't too wide for my narrow door). And now the shop is clear for whatever the next task is going to be. Options include
- Right wing bottom skin
- Finish left fuel tank
- Start right fuel tank
- Do an aileron or flap
22 Jun 2012
Had the day off so I worked on the right aileron. I started by riveting the top skin on, which is reasonably straightforward solo.
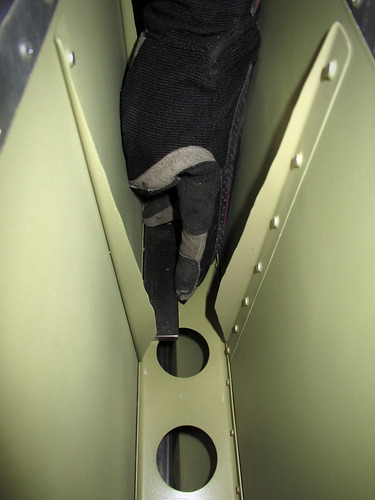
Getting the bottom skin on is a bit more challenging, since you must reach down inbetween the two skins to buck the rivets. However, somewhere along that line of rivets I did pass the 9,000th rivet in the plane! Here's a picture of my gloved hand holding the bucking bar in place with just a couple fingers:
I found it was actually pretty easy like this. Use a small tungsten bucking bar and just lay it down on the spar web, then hold it up against the rivets with your fingers. No chance for damage of the top skin and the rivet shop heads come out looking pretty good.
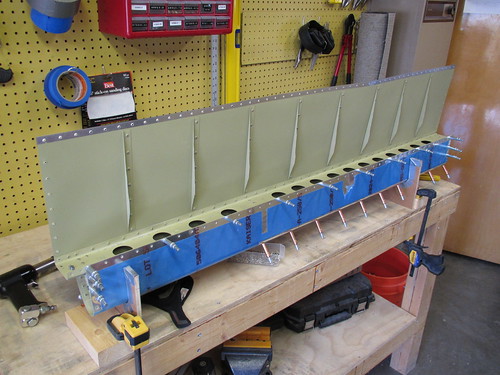
Next up was to cleco in the end ribs and the trailing edge extrusion, then rivet the ribs to the spar (just 4 rivets total). Here's the result:
I was happy to see that my trailing edge was very straight.
Once all of the main rib rivets are done, the only pieces left are the trailing edge and the hinge bits. Here's the almost-complete aileron awaiting the trailing edge sealant:
And here it is under a big stack of books after I had applied sealant:
I mixed 20g of sealant with 2g of accelerant for this and that was probably twice as much as I need, so I recommend using a 10/1 mix if you're making ProSeal out of the can. I'm going to let this sit for a few days, then pull the clecos (and soak them in MEK for a couple days) and get to back-riveting the double-flush trailing edge rivets.
23 Jun 2012
While waiting for the aileron trailing edge sealant to cure, I got a head start on the right flap assembly by riveting together all of the nose ribs.
All but the center hinge hanger can be squeezed. The center one is too thick for my squeezer to get any leverage on it. I ended up putting the double-flush rivet flange in a vice and then solo riveting the AN470 rivets with gun and bucking bar. No problems.
26 Jun 2012
After a couple days of the right aileron trailing edge sealing, I took the clecos out and back-riveted the trailing edge double-flush rivets. It turns out that 2 days of curing wasn't quite enough for the ProSeal; it separated in one little place. So next time, 3 days. The rivets looked great, so I moved on to the hinge hardware. Here is a picture of the inboard hinge weldment, which has the pivot pin at the bottom and the actuation attachment pin at the top.
And here is the outboard hinge weldment. Somewhere on this assembly I need to work in a bonding strap to connect to the main wing body. I'll worry more about this later.
I haven't cut the aluminum spacer yet, so I technically don't have all of the pieces for the aileron done yet, but it's pretty close. I went ahead and put the aileron in place on the wing body to see how it fit and to have a place to store it. Here's the full-down position:
And here's the full-up position:
With the aileron off the workbench for awhile, I'll move on to the right flap.
| <-- May 2012 | July 2012 --> |