
| Workshop | Empennage | Wings | Fuselage | Contact |
| <-- October 2010 | December 2010 --> |
Chronological Updates, November, 2010
19 Nov 2010
The wing kit arrives!
The wing kit was actually ready to ship several weeks ago, but between my Mt. Washington and Mt. Kilimanjaro trips, I had them delay shipment until I knew I'd be home. Today was the day! The wings arrived in two crates weighing over 600 pounds together.
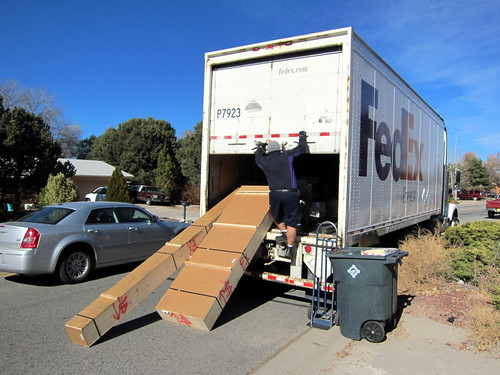
It was a trick trying to get those heavy boxes into my house with just two people and a hand truck... but we managed. I spent the next five hours unpacking and going through the inventory.
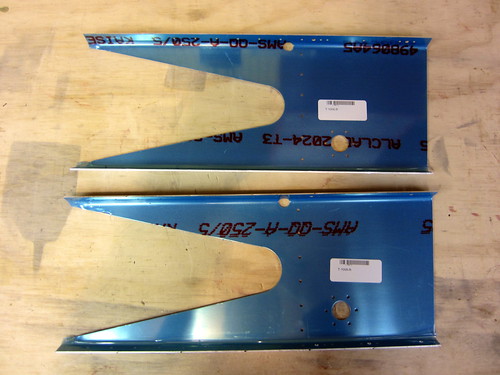
There were only three problems with the inventory that I could find. In one of the hardware bags, there were supposed to be 10 of a certain type of large washer. I got nine and then another washer that was not quite the same size. More significantly, I got two T-1005-R forward tank spars rather than one -R and one -L.
The last problem was that I only received one tie-down block, but since I already have third-party tie-down blocks that come pre-tapped, I don't neeed the ones from Van's anyway. Hopefully Van's will just ship me replacements for the washer and the tank spar.
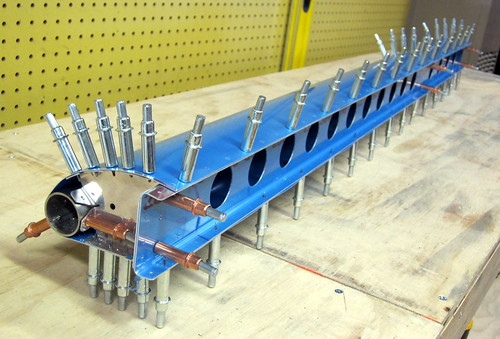
I'm still pretty jetlagged from Africa, so I didn't want to start real work on the main spar and risk screwing something up. However, I couldn't just let it sit there in my shop and not do anything... so I went ahead and cleco'd the extension onto the right-side main wing spar. Easily three minutes of work has now been completed on the wing assembly tasks!

With that monumental task complete, I called it a night.
24 Nov 2010
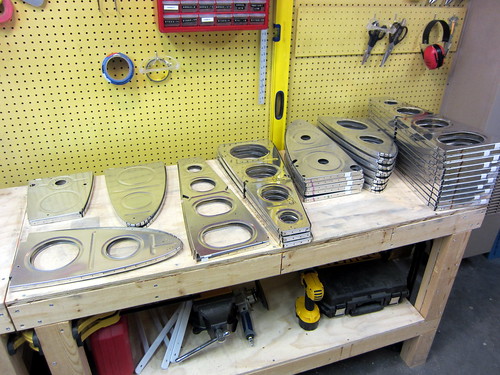
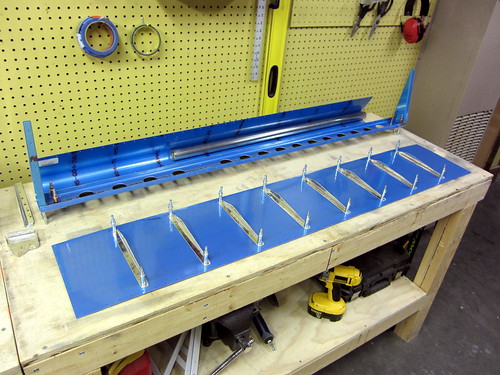
I started working on the first chapter in the wing plans, which covers the main wing spars. Unfortunately, it accomplishes almost nothing before needing a small amount of priming. I got the extensions and their splice brackets matched drilled and deburred, which made them ready for priming. Then I skipped ahead a bit and match drilled the two tie down brackets. My wee bandsaw wasn't hearty enough to trim the brackets to length, so I went to Bob's shop to use the megasaw. Cut threw it like butter.
With these few parts ready for priming, there was nothing left to do in that section without first priming these bits, and I didn't want to deal with the overhead of priming for just 12 small parts. So next I'll continue on with some other section and get additional parts ready for priming.
26 Nov 2010
I decided to start the ailerons out of sequence because they only require a small amount of work before some parts need priming. I'll combine these parts with those of some other section(s) to allow for a significant number of parts during the first priming session of the wings.
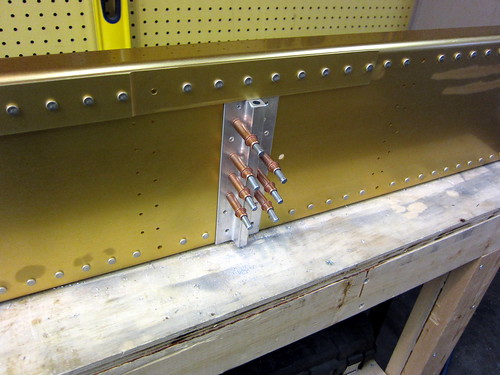
The first step for the ailerons is to assemble the entire leading edge section.
Getting the skin on was difficult, and it took a bit of persuading, but in the end the entire leading edge went together perfectly without trouble. After match drilling a few holes, the next step was to fabricate the 16 skin stiffeners. This was thoroughly dull, but after a couple hours I had all the stiffeners for the left side aileron cut, drilled, deburred, and dimpled.
With this done, the left aileron is also bottlenecked behind priming of the stiffeners and the inner surfaces of the skins.
The wing kit arrives!
The wing kit was actually ready to ship several weeks ago, but between my Mt. Washington and Mt. Kilimanjaro trips, I had them delay shipment until I knew I'd be home. Today was the day! The wings arrived in two crates weighing over 600 pounds together.
It was a trick trying to get those heavy boxes into my house with just two people and a hand truck... but we managed. I spent the next five hours unpacking and going through the inventory.
There were only three problems with the inventory that I could find. In one of the hardware bags, there were supposed to be 10 of a certain type of large washer. I got nine and then another washer that was not quite the same size. More significantly, I got two T-1005-R forward tank spars rather than one -R and one -L.
The last problem was that I only received one tie-down block, but since I already have third-party tie-down blocks that come pre-tapped, I don't neeed the ones from Van's anyway. Hopefully Van's will just ship me replacements for the washer and the tank spar.
I'm still pretty jetlagged from Africa, so I didn't want to start real work on the main spar and risk screwing something up. However, I couldn't just let it sit there in my shop and not do anything... so I went ahead and cleco'd the extension onto the right-side main wing spar. Easily three minutes of work has now been completed on the wing assembly tasks!
With that monumental task complete, I called it a night.
24 Nov 2010
I started working on the first chapter in the wing plans, which covers the main wing spars. Unfortunately, it accomplishes almost nothing before needing a small amount of priming. I got the extensions and their splice brackets matched drilled and deburred, which made them ready for priming. Then I skipped ahead a bit and match drilled the two tie down brackets. My wee bandsaw wasn't hearty enough to trim the brackets to length, so I went to Bob's shop to use the megasaw. Cut threw it like butter.
With these few parts ready for priming, there was nothing left to do in that section without first priming these bits, and I didn't want to deal with the overhead of priming for just 12 small parts. So next I'll continue on with some other section and get additional parts ready for priming.
26 Nov 2010
I decided to start the ailerons out of sequence because they only require a small amount of work before some parts need priming. I'll combine these parts with those of some other section(s) to allow for a significant number of parts during the first priming session of the wings.
The first step for the ailerons is to assemble the entire leading edge section.
Getting the skin on was difficult, and it took a bit of persuading, but in the end the entire leading edge went together perfectly without trouble. After match drilling a few holes, the next step was to fabricate the 16 skin stiffeners. This was thoroughly dull, but after a couple hours I had all the stiffeners for the left side aileron cut, drilled, deburred, and dimpled.
With this done, the left aileron is also bottlenecked behind priming of the stiffeners and the inner surfaces of the skins.
| <-- October 2010 | December 2010 --> |