
| Workshop | Empennage | Wings | Fuselage | Contact |
| <-- December 2013 | February 2014 --> |
Chronological Updates, January, 2014
4 Jan 2014
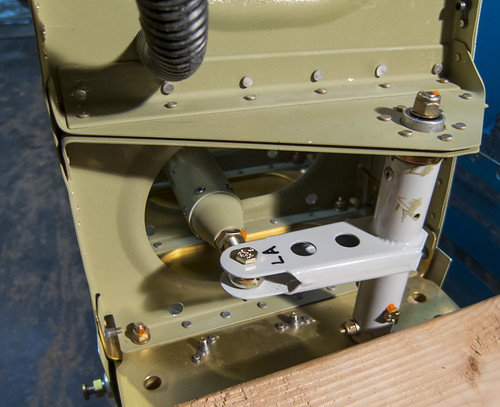
With the minor fiascos of the left wing torque tube out of the way, I set about getting the pushrods temporarily installed and sized. Stared by attaching the main pushrod to the torque tube with a temporary bolt:
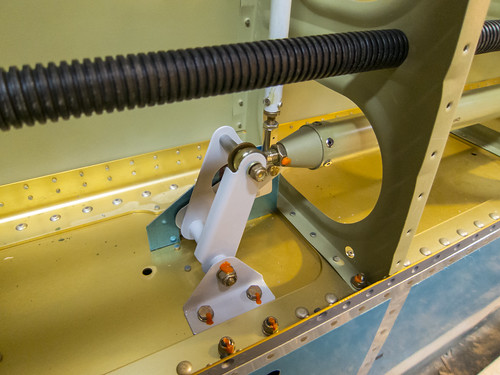
Next, I attached the other end of the main pushrod to the left aileron bellcrank and held the bellcrank in its neutral position with the provided jug plate. By then measuring the position of the torque tube relative to the fuel tank inboard rib, I could set the length of the pushrod to its final value and lock it in place. Once this was done, I attached the aileron to bellcrank pushrod to the bellcrank temporarily. The result looksed something like this:
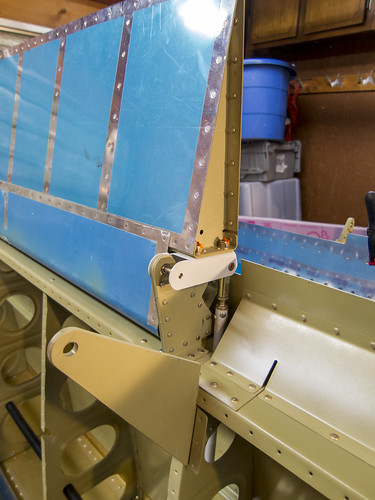
The other end of the smaller pushrod got temporarily attached to the aileron itself, which had also been temporarily attached to the wing:
To set the final length of the smaller pushrod, I need to get the aileron into its neutral position, which requires the flap to be in place, so that'll come a little later.
26 Jan 2014
Will came over today to do the bits of the right wing bottom skin riveting that I couldn't do solo. We had all the hard bits done in about two hours then went to lunch. Later in the afternoon, I went back and finished off a few dozen easy rivets that were remaining and attached the nutplates to the access plate holes. This completes the bottom skins for the right wing!
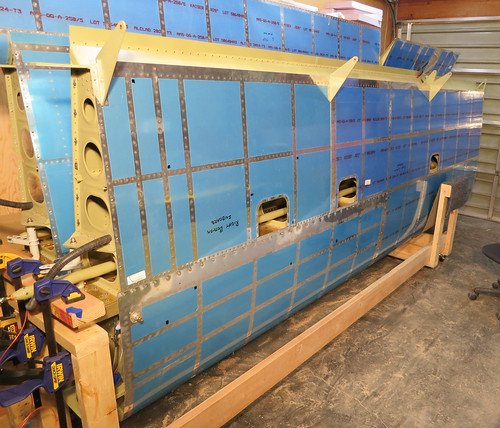
This also means that the right wing is now structurally complete with the exception of the wingtip. Big milestone! Of course, there's still the entire bottom skin for the left wing... but there's plenty of random internal stuff to do on that wing before we start the rivet extravaganza again.
With the minor fiascos of the left wing torque tube out of the way, I set about getting the pushrods temporarily installed and sized. Stared by attaching the main pushrod to the torque tube with a temporary bolt:
Next, I attached the other end of the main pushrod to the left aileron bellcrank and held the bellcrank in its neutral position with the provided jug plate. By then measuring the position of the torque tube relative to the fuel tank inboard rib, I could set the length of the pushrod to its final value and lock it in place. Once this was done, I attached the aileron to bellcrank pushrod to the bellcrank temporarily. The result looksed something like this:
The other end of the smaller pushrod got temporarily attached to the aileron itself, which had also been temporarily attached to the wing:
To set the final length of the smaller pushrod, I need to get the aileron into its neutral position, which requires the flap to be in place, so that'll come a little later.
26 Jan 2014
Will came over today to do the bits of the right wing bottom skin riveting that I couldn't do solo. We had all the hard bits done in about two hours then went to lunch. Later in the afternoon, I went back and finished off a few dozen easy rivets that were remaining and attached the nutplates to the access plate holes. This completes the bottom skins for the right wing!
This also means that the right wing is now structurally complete with the exception of the wingtip. Big milestone! Of course, there's still the entire bottom skin for the left wing... but there's plenty of random internal stuff to do on that wing before we start the rivet extravaganza again.
| <-- December 2013 | February 2014 --> |