
| Workshop | Empennage | Wings | Fuselage | Contact |
| <-- May 2011 | July 2011 --> |
Chronological Updates, June, 2011
5 Jun 2011
Today I finished off a bunch of small tasks, leaving a lot more green on my completion diagram than was there yesterday.
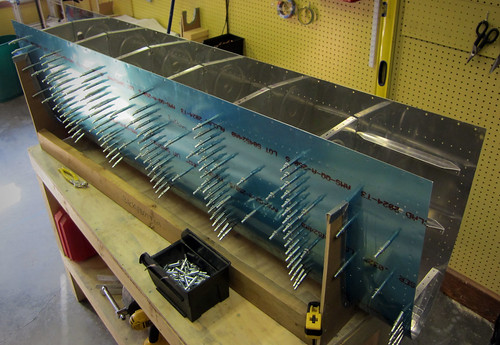
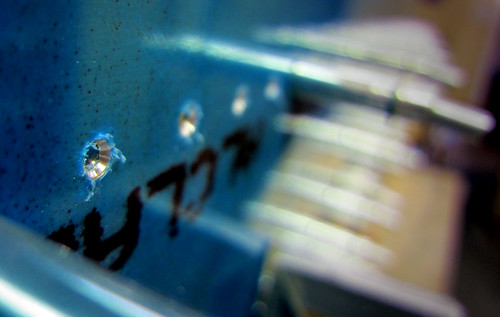
Over the last few days it has been really hot in the shop, so Jeremy and I have been splitting up the task of finishing the rivets on the right leading edge into 15-30 minutes at a time. Last night we finally put in the last of the rivets and fixed the few bad ones that needed drilling out. With that, the leading edges are done per the plans. I started preparation for the right side landing light lens assembly as well, but didn't get too far. I riveted together the bottom side lens bracket bars and took the blue vinyl around the top side rivet holes on the skin. Finally, I coated the lens in blue tape to protect it during the fabrication process. Not feeling like cutting acrylic with the bandsaw today, I put the lens (and leading edge assembly) aside for now.
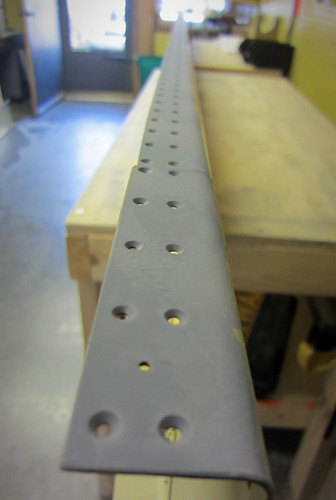
With the leading edge finally off the workbench, I had room to get the second wing spar up on the tables and prime its flanges. This was the last step left in the main spar chapter of the plans, so with those done I moved them into the garage for storage. They won't be needed again until I have the cradles built and am ready to attach the leading edges and fuel tanks to the spar.
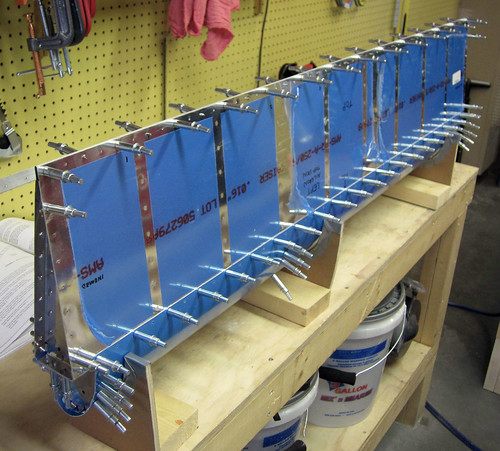
I decided to revisit the ailerons since they had been put on hold pending a first priming pass long ago. The next step was to back-rivet the stiffeners onto the skins. Despite this requiring 228 rivets, it took only an hour, by myself no less, because back riveting is awesome and fast.
I got the nutplates for the inboard static wicks riveted on without a problem, I hope that the aileron will be thick enough at the aft nutplate to support a standard screw; otherwise, I'll have to grind one down or risk dimpling the top skin up a bit (like I did on the elevators by accident).
12 Jun 2011
In the past week I've done a bunch of work on the left fuel tank and left aileron.
I started work on the fuel tanks awhile back in January when I did the primer pass for the leading edges. I knew that most of the fuel tanks don't get primer (until after they're assembled and sealed, if at all), but that the Z attach brackets could be primed as they were external to the tank proper. So I did a very small amount of work to get them match-drilled to the rear tank baffles and then threw them in with the parts to be primed. I did forget to countersink the nutplate attach rivet holes, though, so now those countersinks are bright silver on otherwise green pieces.

With the countersinks cut, I went ahead and riveted on the nutplates, rendering the brackets complete. These are the last thing that gets attached to the fuel tanks per the plans, but are the first parts completed. Go figure.

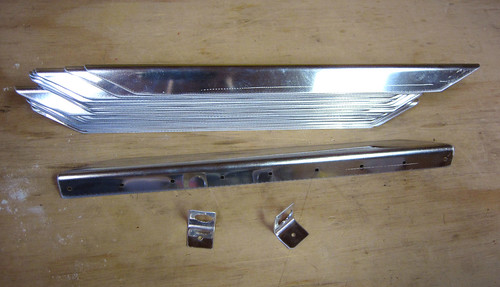
The next step was to cut out all of the tank skin stiffeners and the vent line clips. I made relatively quick work of these with my snips.
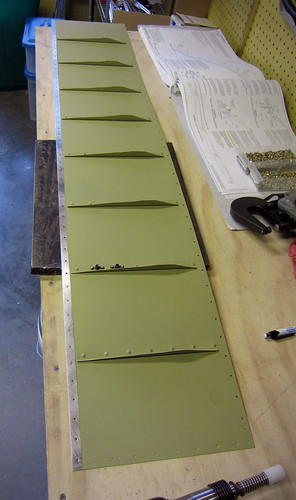
Once all of those were done, it was time for the initial assembly of the fuel tank. I started with the left-side tank. First the stiffeners went into the skin:
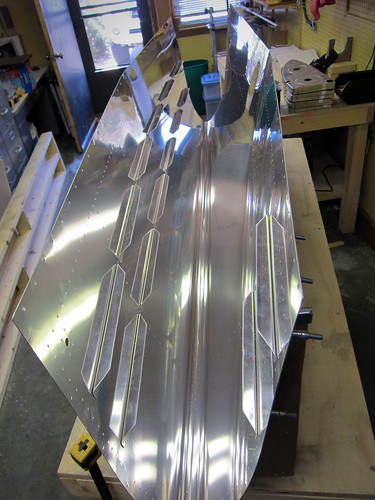
Then the ribs go in. For some reason this was really difficult. I had a really hard time getting the holes to line up and it took forever. But they did eventually all go in.
Having to stuggle to get a lot of those clecos in led to my hands hurting a lot and being blistered, so Jeremy helped with the cleco pliers while I match drilled all of the holes.
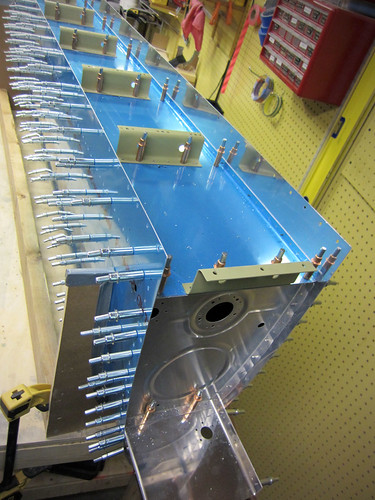
The last bit of work I did on the tanks today was to figure out where I was going to mount the fuel level sensor. I don't like the inelegant float-style sensors that Van's recommends; I want to go with a capacitance sender. The trouble with them is that the sensitive region has to be straight, so you need to find a straight line within the tank that doesn't touch anything metal and goes from as low a point as possible to as high a point as possible. The best I could do was this span from the lower-inboard edge of the inboard bay to the upper-outboard-aft corner of the second bay:
This span is about 24" long, which is conveniently the maximum length they make these probes in, and covers most of the height span of fuel in the tank. When the top of the sensor is covered in fuel, there'll be a few gallons space left in the tank, so I'll have to burn a few gallons of fuel before I start seeing a change in my fuel level readout in the cockpit, but that's not problem. Below the bottom edge is probably just a gallon or two, so empty on the gauge will be a reasonably accurate figure.
I did a bunch of work on the right aileron today, fully assembling all non-hinge parts for match drilling.
I got the trailing edge piece cut down to size, got all of the holes match-drilled, and all non-skin parts deburred and dimpled. The only work left on this assembly before final priming is to deburr and dimple the forward and aft edges of the two aft skins, and to countersink one side of the trailing edge extrusion. Not much work left on this one, then it'll get stored until the next time I prime.
18 Jun 2011
This week I got the left fuel tank up to the point of having to wait for parts I've purchased that haven't come in yet. Specifically, I got the aft baffle match-drilled as well as all of the Z-attach brackets.
In addition to match-drilling all of these holes, I also did the countersinking of the baffle-to-skin hole lines.
These are somewhat unique thus far in the project as they are the first skin holes that get countersunk instead of dimpled. I gather that this is done because once the rest of the tank is assembled and sealed, it would be very difficult to get the aft baffle in place past all the dimples when there is also a slathering of proseal in the way. Anyway, it's done.
The only remaining steps on the left fuel tank prior to "disassemble the whole thing" are to fit the fuel cap flange and the fuel level sensor. I've put in an order for the fuel level sensor, but it is a made-to-order part and hasn't shipped yet, so that's on hurry-up-and-wait status. As for the fuel cap, I'm somewhat underwhelmed by the ones that Van's sent with the kits, and I'm considering shelling out the extra money for the machine-contoured locking versions that are really nice. Pricey, but not absurdly so. And since I'm likely to have a sizeable financial hiatus after the wings are complete... what's another couple hundred bucks?
In the meantime while I'm waiting for these parts, I've put the left tank back into storage and started on the right tank. I didn't get very far, just got the vinyl pulled off the inside of the skin, verified that the edges were deburred (when did I do this??), and cleco'd the stiffeners and fuel drain fitting in place.
In aileron news, I got both of the left aileron skins deburred and dimpled. They were already primed, so they're done and ready for final rivets when that time rolls around. I also got the trailing edge countersunk on both sides, so it is ready for surface chemistry. The left aileron is therefore now at the point where it is complete up through surface treatment, and then it will be time for final assembly. I've put the skins into storage and the rest of the parts on the wall of parts to be treated. I'm pipelining several assemblies at once, so it may be some time before I actually surface treat this aileron.
22 Jun 2011
Over the last few days I've gotten the right-side fuel tank up to the same point the left-side tank is at, which is to say bottlenecked behind the pending arrival of my locking fuel caps and capacitive fuel senders. The fuel caps are already on their way, no word on the senders yet. Anyway, the fuel tanks are both on standby for the time being.
23 Jun 2011
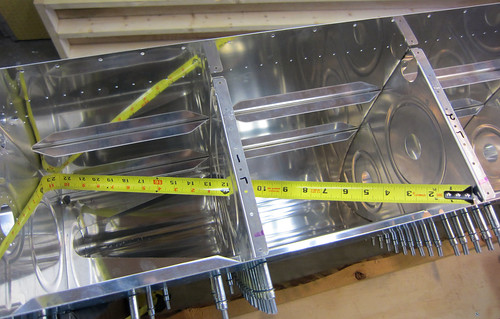
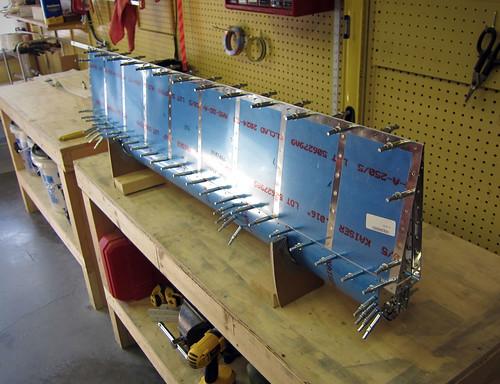
I spent some time this evening on the right elevator. I assembled the whole thing and did all the match drilling. It looks pretty much like the other one did, so I didn't take much in the way of photos. Just this one:
After that I disassembled the whole thing again to its component parts, and started deburring and dimpling everything. I got all of the skeleton parts finished and ready for surface chemistry except for the trailing edge which still needs countersinking. All three skins still need some deburring and dimpling, and the nose skin needs some of the vinyl removed and a scuff job on the inside. Then this assembly will be caught up to the left-side one.
Today I finished off a bunch of small tasks, leaving a lot more green on my completion diagram than was there yesterday.
Over the last few days it has been really hot in the shop, so Jeremy and I have been splitting up the task of finishing the rivets on the right leading edge into 15-30 minutes at a time. Last night we finally put in the last of the rivets and fixed the few bad ones that needed drilling out. With that, the leading edges are done per the plans. I started preparation for the right side landing light lens assembly as well, but didn't get too far. I riveted together the bottom side lens bracket bars and took the blue vinyl around the top side rivet holes on the skin. Finally, I coated the lens in blue tape to protect it during the fabrication process. Not feeling like cutting acrylic with the bandsaw today, I put the lens (and leading edge assembly) aside for now.
With the leading edge finally off the workbench, I had room to get the second wing spar up on the tables and prime its flanges. This was the last step left in the main spar chapter of the plans, so with those done I moved them into the garage for storage. They won't be needed again until I have the cradles built and am ready to attach the leading edges and fuel tanks to the spar.
I decided to revisit the ailerons since they had been put on hold pending a first priming pass long ago. The next step was to back-rivet the stiffeners onto the skins. Despite this requiring 228 rivets, it took only an hour, by myself no less, because back riveting is awesome and fast.
I got the nutplates for the inboard static wicks riveted on without a problem, I hope that the aileron will be thick enough at the aft nutplate to support a standard screw; otherwise, I'll have to grind one down or risk dimpling the top skin up a bit (like I did on the elevators by accident).
12 Jun 2011
In the past week I've done a bunch of work on the left fuel tank and left aileron.
I started work on the fuel tanks awhile back in January when I did the primer pass for the leading edges. I knew that most of the fuel tanks don't get primer (until after they're assembled and sealed, if at all), but that the Z attach brackets could be primed as they were external to the tank proper. So I did a very small amount of work to get them match-drilled to the rear tank baffles and then threw them in with the parts to be primed. I did forget to countersink the nutplate attach rivet holes, though, so now those countersinks are bright silver on otherwise green pieces.
With the countersinks cut, I went ahead and riveted on the nutplates, rendering the brackets complete. These are the last thing that gets attached to the fuel tanks per the plans, but are the first parts completed. Go figure.
The next step was to cut out all of the tank skin stiffeners and the vent line clips. I made relatively quick work of these with my snips.
Once all of those were done, it was time for the initial assembly of the fuel tank. I started with the left-side tank. First the stiffeners went into the skin:
Then the ribs go in. For some reason this was really difficult. I had a really hard time getting the holes to line up and it took forever. But they did eventually all go in.
Having to stuggle to get a lot of those clecos in led to my hands hurting a lot and being blistered, so Jeremy helped with the cleco pliers while I match drilled all of the holes.
The last bit of work I did on the tanks today was to figure out where I was going to mount the fuel level sensor. I don't like the inelegant float-style sensors that Van's recommends; I want to go with a capacitance sender. The trouble with them is that the sensitive region has to be straight, so you need to find a straight line within the tank that doesn't touch anything metal and goes from as low a point as possible to as high a point as possible. The best I could do was this span from the lower-inboard edge of the inboard bay to the upper-outboard-aft corner of the second bay:
This span is about 24" long, which is conveniently the maximum length they make these probes in, and covers most of the height span of fuel in the tank. When the top of the sensor is covered in fuel, there'll be a few gallons space left in the tank, so I'll have to burn a few gallons of fuel before I start seeing a change in my fuel level readout in the cockpit, but that's not problem. Below the bottom edge is probably just a gallon or two, so empty on the gauge will be a reasonably accurate figure.
I did a bunch of work on the right aileron today, fully assembling all non-hinge parts for match drilling.
I got the trailing edge piece cut down to size, got all of the holes match-drilled, and all non-skin parts deburred and dimpled. The only work left on this assembly before final priming is to deburr and dimple the forward and aft edges of the two aft skins, and to countersink one side of the trailing edge extrusion. Not much work left on this one, then it'll get stored until the next time I prime.
18 Jun 2011
This week I got the left fuel tank up to the point of having to wait for parts I've purchased that haven't come in yet. Specifically, I got the aft baffle match-drilled as well as all of the Z-attach brackets.
In addition to match-drilling all of these holes, I also did the countersinking of the baffle-to-skin hole lines.
These are somewhat unique thus far in the project as they are the first skin holes that get countersunk instead of dimpled. I gather that this is done because once the rest of the tank is assembled and sealed, it would be very difficult to get the aft baffle in place past all the dimples when there is also a slathering of proseal in the way. Anyway, it's done.
The only remaining steps on the left fuel tank prior to "disassemble the whole thing" are to fit the fuel cap flange and the fuel level sensor. I've put in an order for the fuel level sensor, but it is a made-to-order part and hasn't shipped yet, so that's on hurry-up-and-wait status. As for the fuel cap, I'm somewhat underwhelmed by the ones that Van's sent with the kits, and I'm considering shelling out the extra money for the machine-contoured locking versions that are really nice. Pricey, but not absurdly so. And since I'm likely to have a sizeable financial hiatus after the wings are complete... what's another couple hundred bucks?
In the meantime while I'm waiting for these parts, I've put the left tank back into storage and started on the right tank. I didn't get very far, just got the vinyl pulled off the inside of the skin, verified that the edges were deburred (when did I do this??), and cleco'd the stiffeners and fuel drain fitting in place.
In aileron news, I got both of the left aileron skins deburred and dimpled. They were already primed, so they're done and ready for final rivets when that time rolls around. I also got the trailing edge countersunk on both sides, so it is ready for surface chemistry. The left aileron is therefore now at the point where it is complete up through surface treatment, and then it will be time for final assembly. I've put the skins into storage and the rest of the parts on the wall of parts to be treated. I'm pipelining several assemblies at once, so it may be some time before I actually surface treat this aileron.
22 Jun 2011
Over the last few days I've gotten the right-side fuel tank up to the same point the left-side tank is at, which is to say bottlenecked behind the pending arrival of my locking fuel caps and capacitive fuel senders. The fuel caps are already on their way, no word on the senders yet. Anyway, the fuel tanks are both on standby for the time being.
23 Jun 2011
I spent some time this evening on the right elevator. I assembled the whole thing and did all the match drilling. It looks pretty much like the other one did, so I didn't take much in the way of photos. Just this one:
After that I disassembled the whole thing again to its component parts, and started deburring and dimpling everything. I got all of the skeleton parts finished and ready for surface chemistry except for the trailing edge which still needs countersinking. All three skins still need some deburring and dimpling, and the nose skin needs some of the vinyl removed and a scuff job on the inside. Then this assembly will be caught up to the left-side one.
| <-- May 2011 | July 2011 --> |