
| Workshop | Empennage | Wings | Fuselage | Contact |
Flaps Construction
Current status: Under construction.
Time invested on this sub-assembly: 39 hours (38 by me)
Still waiting on riveting help to finish up the leading edges. In lieu of that, I started on the flaps chapter.
First thing to do was to cut out a set of flap cradles. The plans call for six and recommend building both flaps at the same time. I'm just going to do one set and build the flaps serially (at least for now) and see how that goes.

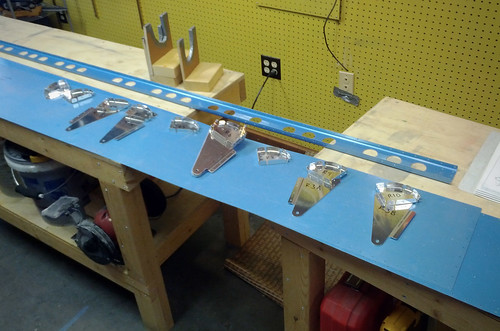
With those out of the way, I located all of the parts for the front section of the left flap, matched drilled the holes they share, and deburred all edges and holes.
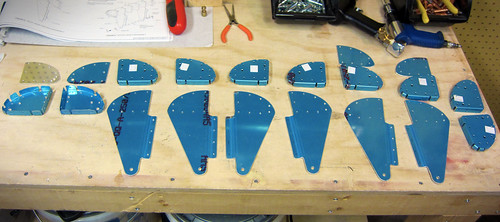
These parts will become all of the nose ribs as well as the three hinge hanger assemblies. I stopped here for the night.
14 Feb 2011
Did a quick hour of work on the left flap this evening. The initial assembly goes pleasingly fast; in no time at all I had a fully assembled flap sitting on my workbench.
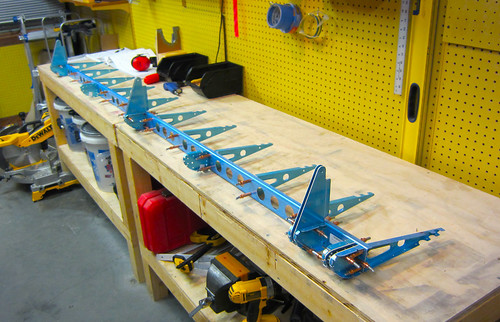
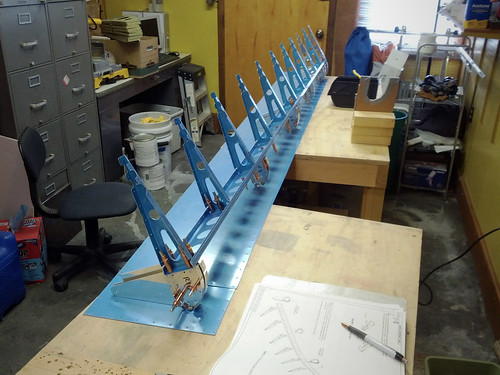
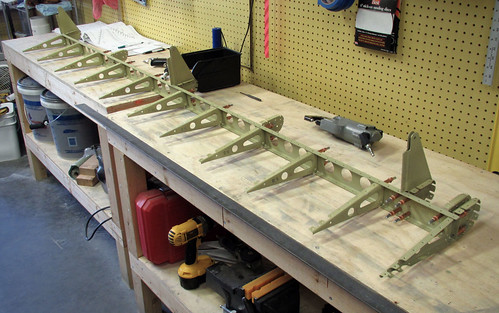
I started with the internals, assembling the various ribs and hinge pieces onto the flap spar:
Next up came the four skin pieces. The top and bottom pieces were a piece of cake; the leading edges required a bit of persuading, but were much easier than their aileron equivalents.
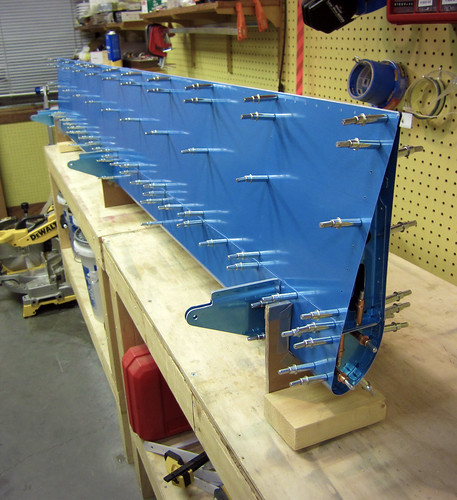
The next step is to drill all the skin holes, which is going to take awhile, so I called it quits here for the evening.
16 Feb 2011
Did all of the match-drilling of the skins for the left flap today. Not much visually interesting there. Also match-drilled the hinge hanger halves together. This required a bit more work than usual because the two flange halves weren't seating against each other all that well. They weren't even parallel. So I clamped them together before drilling.
I just hope that the double-flush rivets that go in these holes will not be compromised by the bending force of the flanges trying to not be flat up against one another. Shouldn't be a problem.
Once this was done, I disassembled the entire left flap, being careful to mark all parts for position and orientation where necessary. I started to deburr a few of the smaller parts, but my cordless screwdriver ran out of batteries almost immediately and I didn't feel like doing it the hard way. So that was it for the night.
4 Feb 2012
Enjoying a break from deburring work on the main wing skins, I decided to start the right flap.
I started by creating all of the skeleton pieces forward of the spar and match-drilling them all together. This included the 10 nose ribs, six flap hinge hanger halves, and several spacers. I went ahead and deburred all of the edges of these parts as well as the holes that they shared (all holes except the skin and spar holes which haven't been drilled yet). With that done, I went ahead and assembled the entire right flap skeleton in preparation for match-drilling the connections to the spar.
Didn't have time to do the actual match drilling before I had to leave for a dinner party. And now I'm going on a business trip for a couple weeks (again), so progress will resume in late February. Cheers!
19 Feb 2012
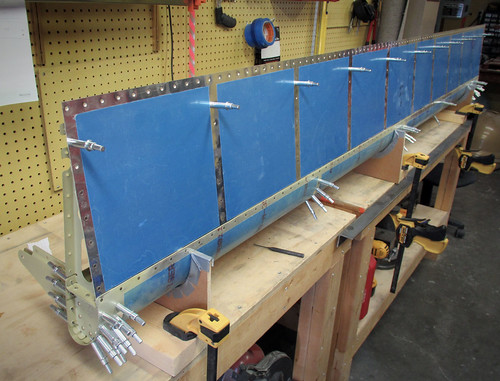
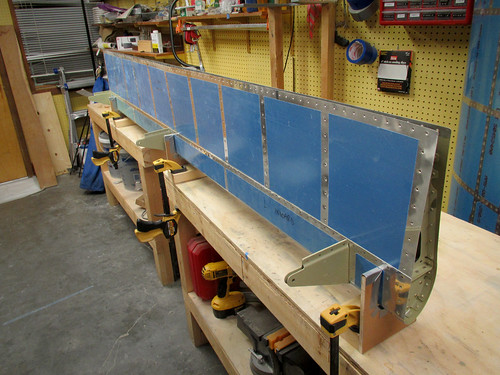
Back in town, I got back to work on the right flap. First thing to do was match-drill all of the holes in the spar. After that, I attached all four skins and the trailing edge extrusions.
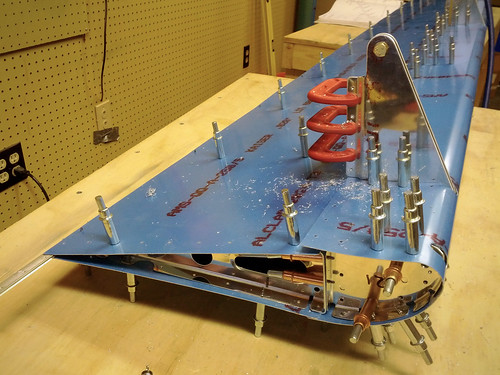
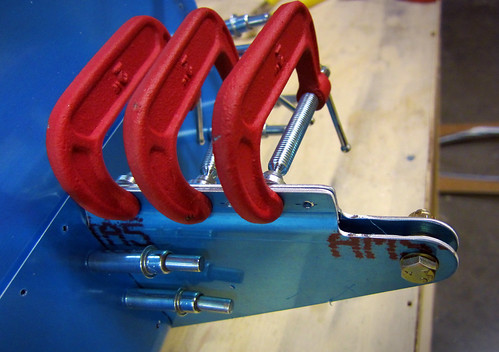
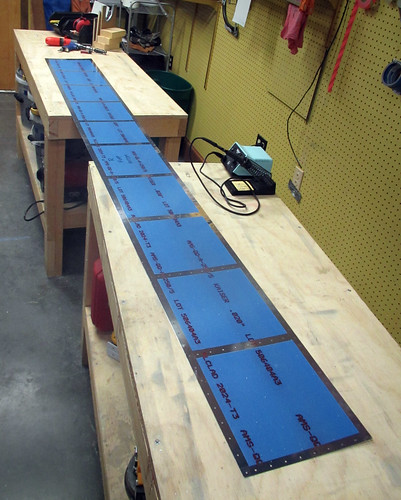
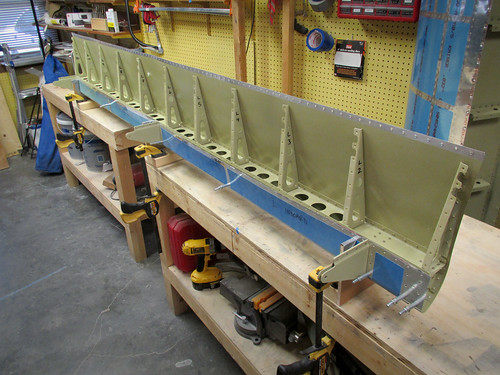
All holes in the skins were match-drilled into the skeleton, and the aft flanges of the three hinge hangars were match drilled. In the photo above you can see that I used three 2" C clamps to keep the flanges flat up against each other as I match drilled.
With all of the match drilling complete, I disassembled the entire flap and started on the deburring and dimpling phase. I got all of the main ribs and nose ribs done and ready for priming. Also countersunk the hing hanger halves, so they're ready for primer as well. The only tasks left on the right flap prior to chemistry are now:
Looking ahead in the plans, I noticed that the first few riveting steps in the flaps involve only nose rib pieces—and all of the nose rib pieces for the left flap were already primed! So I skipped ahead and did a bit of final assembly becase it's way more fun than deburring or countersinking.
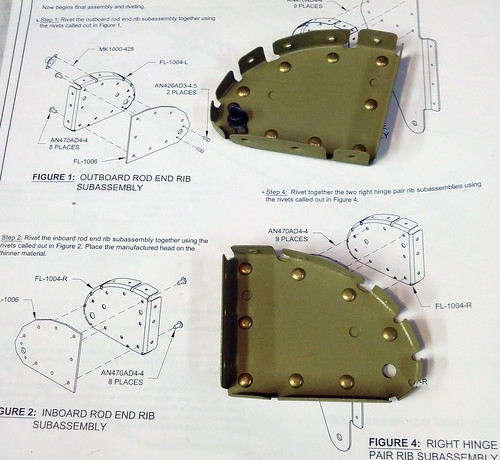
Here's the three left flap hinge hanger sub assemblies fully riveted. The middle one, with its big metal slabs in the middle, used -10 rivets which are the second-longest rivets in the wings! They were way too big for my squeezer so I had to shoot them with the rivet gun.
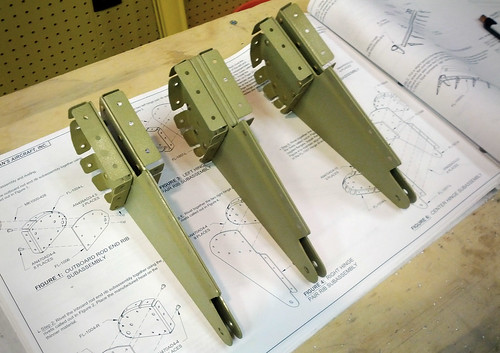
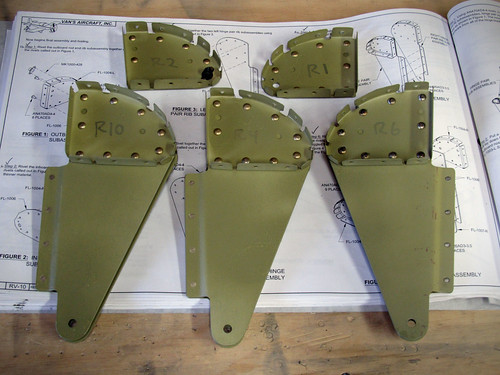
And here's the rod end ribs, the inboard-most ribs in the left flap. That's as far as I could go with already-primed parts, so now I'm resigned to continue the deburring and dimpling. Boo.
20 Feb 2012
I had a stack of assorted parts that needed deburring and/or dimpling before they'd be ready for the final wing priming extravaganza. I decided that today, being a holiday and not having to go to work, I would make as much of a dent in this deburring and dimpling as I could. By the end of the day, I had finished off all of the gap fairings, all of the J stiffeners, the flap spars, one of the four trailing edge extrusions, and had started in on the skins—all but finishing one of the aft flap skins (it just needs to be dimpled, and I'll wait for a hand with that).
The remaining tasks prior to the next priming pass are all now almost all skin-related. In addition to countersinking the three remaining trailing edge pieces, I have:
26 Feb 2012
It has been a week of much deburring.
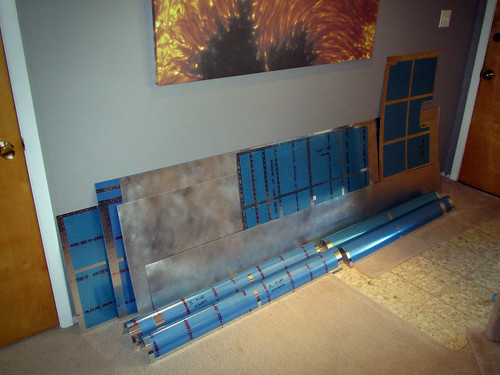
I told myself I was going to finish deburring at least one piece of either flap or wing skin every day after work and I stuck to it. The result was that this morning I finished the last of the pile of skins you see here.
That is all of the wing body skins plus all of the flap skins. The holes are all deburred on both sides, the vinyl is removed where it needs to be, and the inner surfaces have been scuffed and cleaned. The only things they need now prior to final assembly are lap joint tapers for the wing body skins, dimpling, edge deburring (which is quick), and primer.
Most of the pieces still left are somewhat unwieldy for one person, though I was able to dimple all four of the flap nose skins by myself. For the larger pieces, I had Jeremy give me a hand supporting the long end while I ran the dimpler. We worked through all four of the flap aft skins before calling it a day. The remaining task list for skins is now
1 Apr 2012
This is not an April Fools joke! I am done with all alodining for the wing kit!

Spent most of Saturday doing the alumiprep on numerous wing main body and right flap pieces. Today, I followed that up with alodine on all of the remaining parts that needed it.
22 Apr 2012
Happy Earth Day! I seem to have missed the point of Earth Day, as I spent my entire morning flying down to Grants with Jeff for some pancakes, then the entire afternoon spraying toxic primer into the air and letting lots of MEK and assorted other solvents evaporate. The up side is that I have completed the final primer pass on the wings! I am now ready to begin final assembly on all remaining wing subassemblies (except the wingtips, which can't really be done at all until the rest of the wing is complete). Definitely excited about riveting again!
23 Jun 2012
While waiting for the aileron trailing edge sealant to cure, I got a head start on the right flap assembly by riveting together all of the nose ribs.
All but the center hinge hanger can be squeezed. The center one is too thick for my squeezer to get any leverage on it. I ended up putting the double-flush rivet flange in a vice and then solo riveting the AN470 rivets with gun and bucking bar. No problems.
21 Jul 2012
This is likely to be the only post this month; I've been on my honeymoon in Iceland for the first two weeks of the month, the following week of work was insane trying to catch up with everything, and now I'm leaving again for work. So today was my only real chance to get any work done on the plane. Here's what I got done:
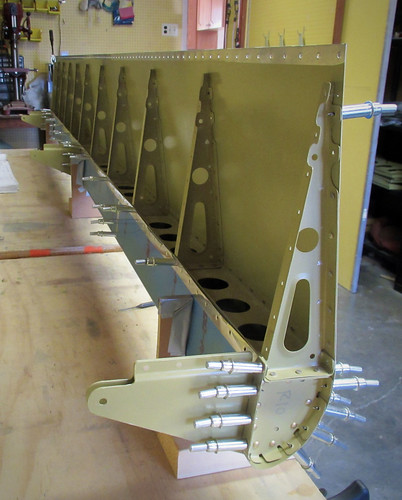
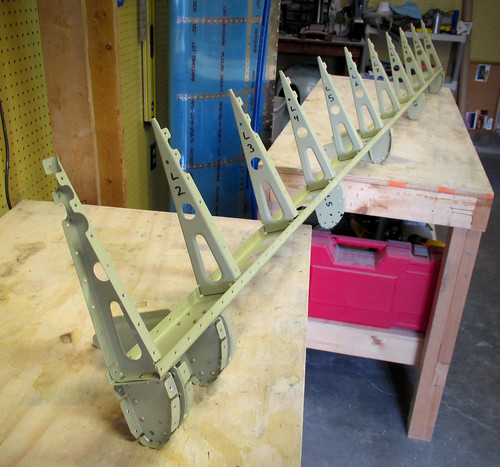
I got the right flap skeleton completely riveted together. Here's a picture about mid-way through it:
I neglected to take a picture of the finished skeleton... just imagine the picture above with no clecos.
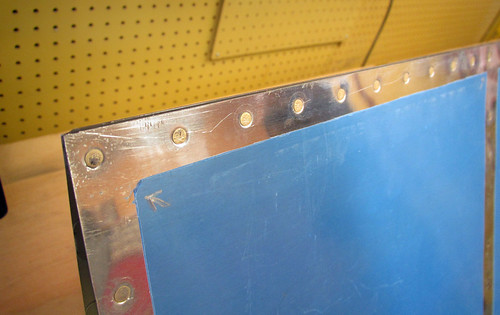
Next, I wrapped the two nose skins into place and slid the top aft skin in place between the nose skins and the main spar. This is somewhat tricky without help. With the three skins in place, it was pretty straightforward to rivet the entire top flange of the main spar and the forward five holes in each main rib:
Here's a view of the same thing but from the bottom:
The remaining steps on the flap are pretty easy—back-rivet the aft two holes on each main rib, blind-rivet the bottom skin and nose skins on, and deal with the trailing edge. But all of that will probably have to wait until next month.
30 Aug 2012
I got the rib-to-top-skin rivets completed on the right flap, then slid the bottom skin in place. I was able to do the bottom flange of the flap spar rivets myself, sticking one hand down between the two pieces of skin to steady the bucking bar. It's a bit of a pain, but not as hard as I was expecting.

Once that's done, there are a bunch of blind rivets to connect the nose skins and bottom skin to the bottom flanges of their respective ribs. The inner-most and outer-most ribs get squeezed with the pneumatic squeezer, and then all of the flap rivets are done except the trailing edge.
I still hadn't finished the countersinks on the last two pieces of trailing edge extrusion so I went ahead and knocked those out. Then, just before leaving for a long mountaineering trip, I mixed up 20g of ProSeal and got the trailing edge extrusions sealing into place. I was gone for over a week, so they had plenty of time to cure. When I came back, back-riveting the double-flush rivets went really quickly.
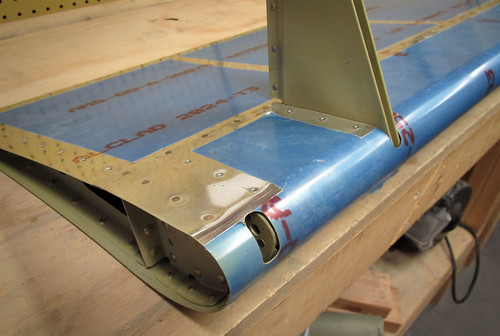
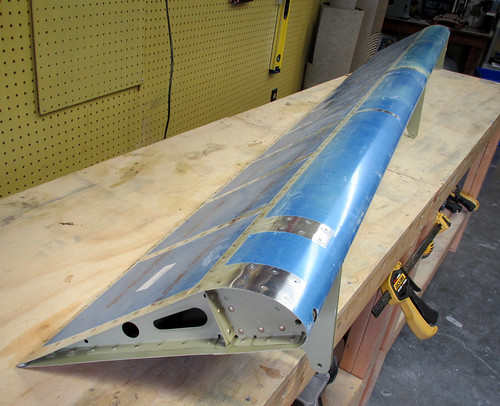
Other than connecting the actuation components, which is recommended to hold off until after painting, the right flap is now complete! Here are a couple of photos showing the final product. First, the inboard end with the hole for the control rod:
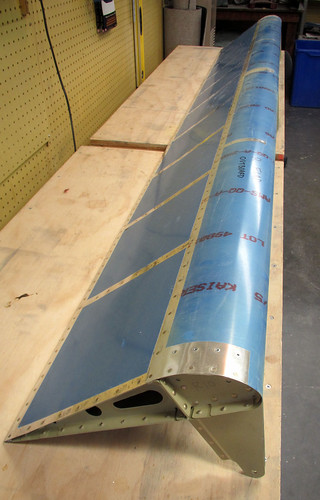
And here's the full flap sitting up on the workbench:
The next step is to attach the flap to the wing, which I'll probably do tomorrow.
6 Aug 2013
With the workbenches free of fuel tanks, finally, I pulled out the parts for the left flap and set to work on final assembly. The skeleton went together reasonably quickly. It should be noted that one of the main ribs in this flap was the 2,000th part to go into the airplane!
From there, the top and nose skins are clecoed on and the top skin is riveted on to the ribs and spar. One of the rivets attaching the top skin to the main flap spar was the 11,000th rivet in the airplane!
Next, the bottom skin is slid into place and riveted to the spar. With both sides of the spar riveted on, the remaining nose rib rivets are blind-riveted into place.
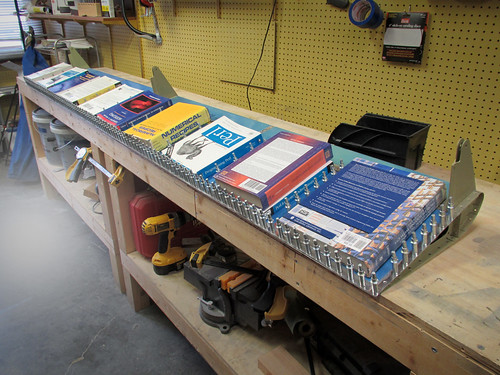
Finally, the trailing edge extrusions are coated in ProSeal and placed between the top and bottom skins. Every hole is clecoed and the bottom skin is clecoed to the ribs. I placed books on the flap to keep it flat against the workbenches. Here it will stay until the sealant has cured—a week or two.
The remaining work on this flap will go very quickly once the trailing edge sealant has cured.
13 Aug 2013
A week has gone by since I put the sealant on the trailing edge of the left flap, so I removed the clecos and back-riveted the trailing edge using a 6' piece of angle iron clamped to the side of my workbench.
I'm very happy with the results; the trailing edge is very straight. I went ahead and finished off a few remaining rivets on the outermost rib and now the sub-assembly is complete. It's sitting in storage until I finish off the left wing main body.
Time invested on this sub-assembly: 39 hours (38 by me)
Updates regarding the flaps
13 Feb 2011Still waiting on riveting help to finish up the leading edges. In lieu of that, I started on the flaps chapter.
First thing to do was to cut out a set of flap cradles. The plans call for six and recommend building both flaps at the same time. I'm just going to do one set and build the flaps serially (at least for now) and see how that goes.
With those out of the way, I located all of the parts for the front section of the left flap, matched drilled the holes they share, and deburred all edges and holes.
These parts will become all of the nose ribs as well as the three hinge hanger assemblies. I stopped here for the night.
14 Feb 2011
Did a quick hour of work on the left flap this evening. The initial assembly goes pleasingly fast; in no time at all I had a fully assembled flap sitting on my workbench.
I started with the internals, assembling the various ribs and hinge pieces onto the flap spar:
Next up came the four skin pieces. The top and bottom pieces were a piece of cake; the leading edges required a bit of persuading, but were much easier than their aileron equivalents.
The next step is to drill all the skin holes, which is going to take awhile, so I called it quits here for the evening.
16 Feb 2011
Did all of the match-drilling of the skins for the left flap today. Not much visually interesting there. Also match-drilled the hinge hanger halves together. This required a bit more work than usual because the two flange halves weren't seating against each other all that well. They weren't even parallel. So I clamped them together before drilling.
I just hope that the double-flush rivets that go in these holes will not be compromised by the bending force of the flanges trying to not be flat up against one another. Shouldn't be a problem.
Once this was done, I disassembled the entire left flap, being careful to mark all parts for position and orientation where necessary. I started to deburr a few of the smaller parts, but my cordless screwdriver ran out of batteries almost immediately and I didn't feel like doing it the hard way. So that was it for the night.
4 Feb 2012
Enjoying a break from deburring work on the main wing skins, I decided to start the right flap.
I started by creating all of the skeleton pieces forward of the spar and match-drilling them all together. This included the 10 nose ribs, six flap hinge hanger halves, and several spacers. I went ahead and deburred all of the edges of these parts as well as the holes that they shared (all holes except the skin and spar holes which haven't been drilled yet). With that done, I went ahead and assembled the entire right flap skeleton in preparation for match-drilling the connections to the spar.
Didn't have time to do the actual match drilling before I had to leave for a dinner party. And now I'm going on a business trip for a couple weeks (again), so progress will resume in late February. Cheers!
19 Feb 2012
Back in town, I got back to work on the right flap. First thing to do was match-drill all of the holes in the spar. After that, I attached all four skins and the trailing edge extrusions.
All holes in the skins were match-drilled into the skeleton, and the aft flanges of the three hinge hangars were match drilled. In the photo above you can see that I used three 2" C clamps to keep the flanges flat up against each other as I match drilled.
With all of the match drilling complete, I disassembled the entire flap and started on the deburring and dimpling phase. I got all of the main ribs and nose ribs done and ready for priming. Also countersunk the hing hanger halves, so they're ready for primer as well. The only tasks left on the right flap prior to chemistry are now:
- Deburr and dimple skins (x4)
- Deburr and dimple spar
- Countersink trailing edge extrusions (x2)
Looking ahead in the plans, I noticed that the first few riveting steps in the flaps involve only nose rib pieces—and all of the nose rib pieces for the left flap were already primed! So I skipped ahead and did a bit of final assembly becase it's way more fun than deburring or countersinking.
Here's the three left flap hinge hanger sub assemblies fully riveted. The middle one, with its big metal slabs in the middle, used -10 rivets which are the second-longest rivets in the wings! They were way too big for my squeezer so I had to shoot them with the rivet gun.
And here's the rod end ribs, the inboard-most ribs in the left flap. That's as far as I could go with already-primed parts, so now I'm resigned to continue the deburring and dimpling. Boo.
20 Feb 2012
I had a stack of assorted parts that needed deburring and/or dimpling before they'd be ready for the final wing priming extravaganza. I decided that today, being a holiday and not having to go to work, I would make as much of a dent in this deburring and dimpling as I could. By the end of the day, I had finished off all of the gap fairings, all of the J stiffeners, the flap spars, one of the four trailing edge extrusions, and had started in on the skins—all but finishing one of the aft flap skins (it just needs to be dimpled, and I'll wait for a hand with that).
The remaining tasks prior to the next priming pass are all now almost all skin-related. In addition to countersinking the three remaining trailing edge pieces, I have:
- 3 aft flap skins
- 4 forward flap skins
- 4 right wing skins
26 Feb 2012
It has been a week of much deburring.
I told myself I was going to finish deburring at least one piece of either flap or wing skin every day after work and I stuck to it. The result was that this morning I finished the last of the pile of skins you see here.
That is all of the wing body skins plus all of the flap skins. The holes are all deburred on both sides, the vinyl is removed where it needs to be, and the inner surfaces have been scuffed and cleaned. The only things they need now prior to final assembly are lap joint tapers for the wing body skins, dimpling, edge deburring (which is quick), and primer.
Most of the pieces still left are somewhat unwieldy for one person, though I was able to dimple all four of the flap nose skins by myself. For the larger pieces, I had Jeremy give me a hand supporting the long end while I ran the dimpler. We worked through all four of the flap aft skins before calling it a day. The remaining task list for skins is now
- Dimple 8 wing body skins
- Edge deburr all flap skins and wing body skins
1 Apr 2012
This is not an April Fools joke! I am done with all alodining for the wing kit!
Spent most of Saturday doing the alumiprep on numerous wing main body and right flap pieces. Today, I followed that up with alodine on all of the remaining parts that needed it.
22 Apr 2012
Happy Earth Day! I seem to have missed the point of Earth Day, as I spent my entire morning flying down to Grants with Jeff for some pancakes, then the entire afternoon spraying toxic primer into the air and letting lots of MEK and assorted other solvents evaporate. The up side is that I have completed the final primer pass on the wings! I am now ready to begin final assembly on all remaining wing subassemblies (except the wingtips, which can't really be done at all until the rest of the wing is complete). Definitely excited about riveting again!
23 Jun 2012
While waiting for the aileron trailing edge sealant to cure, I got a head start on the right flap assembly by riveting together all of the nose ribs.
All but the center hinge hanger can be squeezed. The center one is too thick for my squeezer to get any leverage on it. I ended up putting the double-flush rivet flange in a vice and then solo riveting the AN470 rivets with gun and bucking bar. No problems.
21 Jul 2012
This is likely to be the only post this month; I've been on my honeymoon in Iceland for the first two weeks of the month, the following week of work was insane trying to catch up with everything, and now I'm leaving again for work. So today was my only real chance to get any work done on the plane. Here's what I got done:
I got the right flap skeleton completely riveted together. Here's a picture about mid-way through it:
I neglected to take a picture of the finished skeleton... just imagine the picture above with no clecos.
Next, I wrapped the two nose skins into place and slid the top aft skin in place between the nose skins and the main spar. This is somewhat tricky without help. With the three skins in place, it was pretty straightforward to rivet the entire top flange of the main spar and the forward five holes in each main rib:
Here's a view of the same thing but from the bottom:
The remaining steps on the flap are pretty easy—back-rivet the aft two holes on each main rib, blind-rivet the bottom skin and nose skins on, and deal with the trailing edge. But all of that will probably have to wait until next month.
30 Aug 2012
I got the rib-to-top-skin rivets completed on the right flap, then slid the bottom skin in place. I was able to do the bottom flange of the flap spar rivets myself, sticking one hand down between the two pieces of skin to steady the bucking bar. It's a bit of a pain, but not as hard as I was expecting.
Once that's done, there are a bunch of blind rivets to connect the nose skins and bottom skin to the bottom flanges of their respective ribs. The inner-most and outer-most ribs get squeezed with the pneumatic squeezer, and then all of the flap rivets are done except the trailing edge.
I still hadn't finished the countersinks on the last two pieces of trailing edge extrusion so I went ahead and knocked those out. Then, just before leaving for a long mountaineering trip, I mixed up 20g of ProSeal and got the trailing edge extrusions sealing into place. I was gone for over a week, so they had plenty of time to cure. When I came back, back-riveting the double-flush rivets went really quickly.
Other than connecting the actuation components, which is recommended to hold off until after painting, the right flap is now complete! Here are a couple of photos showing the final product. First, the inboard end with the hole for the control rod:
And here's the full flap sitting up on the workbench:
The next step is to attach the flap to the wing, which I'll probably do tomorrow.
6 Aug 2013
With the workbenches free of fuel tanks, finally, I pulled out the parts for the left flap and set to work on final assembly. The skeleton went together reasonably quickly. It should be noted that one of the main ribs in this flap was the 2,000th part to go into the airplane!
From there, the top and nose skins are clecoed on and the top skin is riveted on to the ribs and spar. One of the rivets attaching the top skin to the main flap spar was the 11,000th rivet in the airplane!
Next, the bottom skin is slid into place and riveted to the spar. With both sides of the spar riveted on, the remaining nose rib rivets are blind-riveted into place.
Finally, the trailing edge extrusions are coated in ProSeal and placed between the top and bottom skins. Every hole is clecoed and the bottom skin is clecoed to the ribs. I placed books on the flap to keep it flat against the workbenches. Here it will stay until the sealant has cured—a week or two.
The remaining work on this flap will go very quickly once the trailing edge sealant has cured.
13 Aug 2013
A week has gone by since I put the sealant on the trailing edge of the left flap, so I removed the clecos and back-riveted the trailing edge using a 6' piece of angle iron clamped to the side of my workbench.
I'm very happy with the results; the trailing edge is very straight. I went ahead and finished off a few remaining rivets on the outermost rib and now the sub-assembly is complete. It's sitting in storage until I finish off the left wing main body.